
PolyGel Vs Builder Gel
PolyGel-style hybrid gels and builder gels can both reinforce natural nails or create extensions, but they behave differently on the brush and are not interchangeable across every brand or system.
You’ll also see acrylic, hard gel, soft builder gel, hybrid gel, PolyGel, and other enhancement systems, which can make the terminology confusing.
The easiest way to compare them is to focus on consistency, application control, curing, removal, and the type and length of enhancement you want.
Both can be used to overlay and reinforce the natural nail, and many formulas can also be used to build length.
Depending on the product, they may be sculpted over nail tips or forms to create an extension.
The important differences are in how the uncured product moves, how it is shaped, whether it needs a separate base or bonder, how it is cured, and whether the finished enhancement is soaked or filed off.
PolyGel-style products and builder gels are often grouped together because both are light-cured enhancement products, but each category includes formulas with different viscosities, strength, flexibility, and removal requirements.
So what’s the difference between PolyGel and builder gel?
The simplest difference is consistency: PolyGel-style hybrid products are usually dense, putty-like, and stay where you place them, while many builder gels are more fluid and self-leveling. Exact base-coat, lamp, curing, extension-length, and removal requirements depend on the specific system.
That means the better choice depends on your skill level, desired length, preferred application style, removal preference, and the instructions for the product you are actually using.
Below, we compare PolyGel and builder gel, explain the application differences, and cover the safety details that matter when working with light-cured nail products.
What Is PolyGel?

PolyGel is a registered Gelish brand name for a hybrid nail enhancement. Online, “polygel” is also commonly used as a generic term for similar hybrid or acrygel-style products, but those products are not necessarily the same formula or system.
These products are designed to offer a sculptable, putty-like working texture that can be shaped before curing, rather than beginning to set on its own like traditional liquid-and-powder acrylic.
They can be used as an overlay on the natural nail to add structure, and many systems can also be used to create extensions.
You can also use it to cover nail tips or nail forms to create a longer nail shape.
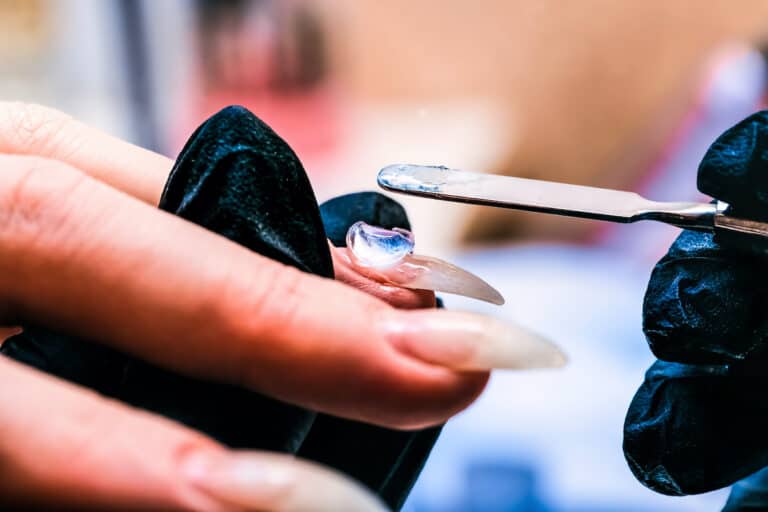
PolyGel-style products are usually thick and non-leveling, which makes them easy to pat and sculpt with a brush without the product quickly running toward the sidewalls.
Many systems use a slip solution to keep the brush from sticking to the uncured product, but use only the liquid recommended for your specific brand rather than substituting alcohol or another homemade mixture unless the manufacturer explicitly permits it.
A slip solution lightly wets the brush so you can pat, smooth, and shape the product. Too much liquid can interfere with control, so follow the manufacturer’s technique rather than soaking the product.
Unlike traditional acrylic, PolyGel-style products must be cured in a compatible UV/LED nail lamp. Match the lamp and cure time to the manufacturer’s instructions rather than choosing by wattage alone.
Because it does not set until it is light-cured, you usually have more working time to refine the shape and apex before curing.
Traditional acrylic begins polymerizing after the liquid and powder are mixed, so the working window is more time-sensitive.
That controlled working time is one reason many beginners find PolyGel-style products easier to position, although creating balanced sidewalls, an appropriate apex, and a durable free edge still takes practice.
What Is Builder Gel?

Builder gel is a broad category of gel enhancement products used for overlays, reinforcement, and, when the formula allows it, sculpted extensions.
Builder gel viscosity varies. Many builder-in-a-bottle formulas are medium-viscosity and self-leveling, while traditional hard builder gels may be thicker and more structured. They generally do not use PolyGel-style slip solution.
Compared with a putty-like hybrid gel, builder gel usually flows and self-levels more, so controlling the cuticle and sidewall area is an important part of the technique.
It can create a structured overlay or extension, but the maximum practical length and required architecture depend on the specific builder gel and the brand’s instructions.
Some builder gels are intended mainly for natural-nail overlays and short extensions, while others are harder, more rigid gels designed for more substantial sculpting. Do not assume every builder gel supports the same maximum length.
Builder gel also requires a compatible UV/LED curing lamp. Do not assume one cure time, lamp, or wattage works for every brand or every thickness of application.
You do not always need to build builder gel in several thin coats. Many systems use a thin slip layer followed by a larger bead to create the apex, while others have different application methods.
For that reason, builder gel is not automatically slower than PolyGel. Application time depends on the formula, nail length, technique, and your experience.
Self-leveling builder gel can reduce filing when controlled well, but it can also flood the sidewalls or cuticle if too much product is used at once. Uncured gel should be removed from the skin before curing.
Neither system is inherently “advanced-only.” Beginners can learn either one, but it is important to practice product control and follow the exact brand system.
PolyGel Vs Builder Gel
Now that you’re a little more familiar with each material, let’s discuss how they compare in practice.
PolyGel And Builder Gel Similarities
Both systems may use a base, primer, or bonding layer, but none of these steps is universal across all brands.
Some formulas require a separate base coat for adhesion, while some builder gels include primer/base components in the formula. Always follow the product system rather than assuming a base is required.
Using an incompatible base, lamp, or cure schedule can contribute to lifting, premature service breakdown, or incomplete curing.
Both PolyGel-style hybrid products and builder gels are light-cured and need the lamp specified or approved by the manufacturer.
This matters for more than wear time. Uncured or under-cured gel can increase exposure to reactive acrylate ingredients, so keep uncured product off the skin and cuticles and do not rely on a hard-feeling surface as proof of a complete cure.
If gel touches the skin before curing, remove it before placing the hand in the lamp. Do not intentionally cure flooded product onto the skin.
Persistent itching, redness, swelling, blistering, or nail lifting after gel use can be a sign of irritation or allergic contact dermatitis. Stop using the product and seek medical advice if a reaction develops.
With good preparation and application, both systems are often maintained at roughly two to four weeks, although nail growth, extension length, lifting, cracks, and daily wear can make earlier maintenance appropriate.
There is no universal rule that PolyGel is stronger than builder gel. Durability depends on the formula, nail architecture, appropriate thickness in stress areas, length, curing, and application quality.
Both can reinforce the natural nail and create extensions, but very long or highly tapered shapes require more careful structure than short overlays.
PolyGel And Builder Gel Differences
The biggest practical differences are viscosity, product control, removal method, and system-specific application steps.
The most noticeable difference is usually how the products move before curing. PolyGel-style products are typically dense and sculptable, while many builder gels self-level.
A hybrid gel is commonly dispensed from a tube or pot and then pressed into shape with a brush, giving you time to build the sidewalls, apex, and free edge before curing.
Because it is usually non-leveling, PolyGel tends to stay where you place it better than a runnier gel.
That can make the product easier to control, but the final strength still depends on balanced structure rather than simply adding more material. Excess thickness can also make complete curing more difficult if it exceeds the brand’s recommended application depth.

Builder gel can range from medium to thick viscosity. Many popular formulas are self-leveling, so they move more readily than PolyGel-style products.
If too much is applied, a self-leveling builder can pool at the sidewalls or cuticle. Working one nail at a time or flash-curing may help when the brand allows it, but a flash cure does not replace the final full cure.
The correct method may be one structured application, a slip layer plus a bead, or multiple coats. Follow the instructions for the builder gel you own.
So builder gel is not necessarily a longer service. A practiced user may find its self-leveling texture faster, while another person may prefer the slower, more sculptable feel of PolyGel.
The main takeaway is that consistency changes technique: PolyGel-style products are usually patted and sculpted, while many builder gels are floated and allowed to self-level.
Many PolyGel-style systems use a manufacturer-approved slip solution to keep the brush workable.
Use the slip solution recommended by the brand instead of improvising a homemade mixture, since excess or incompatible liquid can interfere with product control and the intended application method.
Use only enough slip solution to keep the brush from dragging while you press and smooth the PolyGel into shape.
The goal is controlled sculpting without the PolyGel sticking heavily to the brush.
Builder gel is normally worked directly with a gel brush or the brush supplied in the bottle, without a PolyGel slip solution.
For potted builder gel, a gel brush is used to float and guide the product; builder-in-a-bottle formulas include their own brush.
You do not need a universal “PolyGel brush” versus “builder brush” rule, but the brush should suit the viscosity and application method of the product.
A firmer, compact brush can help pat a dense hybrid gel, while a softer gel brush can help float self-leveling builder gel. The brand’s recommended tool is the safest starting point.
PolyGel Vs Builder Gel Comparison
Here’s a practical summary of the main differences and similarities. Brand-specific instructions still take priority over the general comparison:
| PolyGel | Builder Gel | |
| Consistency | Usually dense and putty-like | Varies; often self-leveling |
| Base Coat | Depends on system | Depends on formula |
| Slip Solution | Commonly used | Usually not used |
| Application | Pat and sculpt | Float/self-level or sculpt, depending on formula |
| Curing | Compatible UV/LED lamp | Compatible UV/LED lamp |
| Curing Time | Follow brand and lamp instructions | Follow brand and lamp instructions |
| Control | Usually stays where placed | Can move toward sidewalls before curing |
| Wear Time | Often 2-4 weeks before maintenance | Often 2-4 weeks before maintenance |
| Removal | Varies by formula; often file-down | May be soak-off or file-off |
Application Process Differences
The application process differs mainly because of product viscosity and because each brand can specify its own prep, primer or base, lamp, cure time, maximum thickness, and removal method.
PolyGel-style products are generally patted and sculpted into place, while builder gel is often floated and allowed to self-level. Neither method is universally easier.
The steps below are a general overview. Your product instructions should take priority, especially for preparation, lamp compatibility, curing time, application thickness, and removal.
PolyGel Application Process
If you are doing your nails with PolyGel, here is everything you will need:
- Clean, dry nails prepared according to the product system
- PolyGel
- Base coat if required by your PolyGel system. Use the gel base specified by the brand; a regular lacquer base coat is not automatically interchangeable.
- PolyGel brush
- Slip solution
- UV light that is compatible with the product
- Nail file
Those are the basic tools, but your system may also require a dehydrator, primer, cleanser, lint-free wipes, or a specific top coat.
If you are using nail tips or forms for extra length, follow the enhancement system’s instructions for attaching or sculpting them.
If you want to add colour over the enhancement, use a compatible polish system after the structure is finished and filed.
Here are the steps:
- Start with clean, dry nails and complete the prep required by your product. If using tips or forms, apply them as directed.
- Apply the recommended bonding or base layer if your system requires one, then cure it with the compatible lamp for the specified time.
- Dispense an appropriate amount of PolyGel and place it on the nail. The amount depends on nail size and extension length, so a fixed “pea-size” is only a rough visual guide.
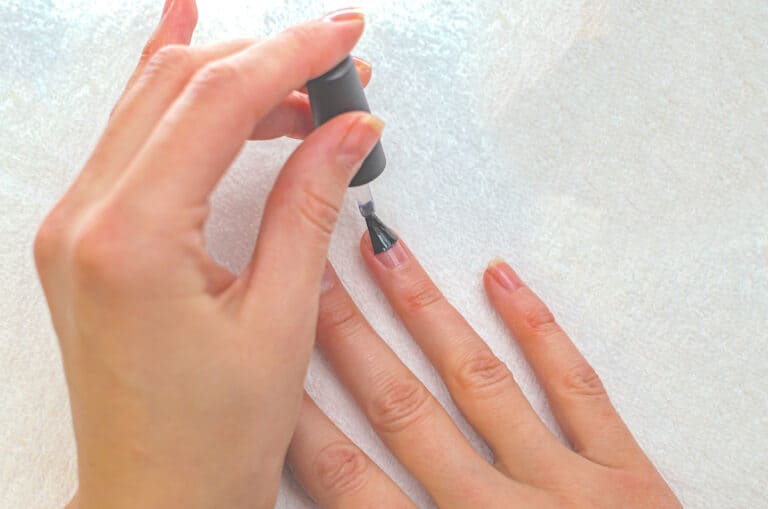
- Lightly moisten the brush with the approved slip solution, then pat and smooth the product while keeping uncured gel off the skin, sidewalls, and cuticle.
- When the structure is balanced, cure for the exact time required by your product and compatible lamp. Do not shorten the cure simply because the surface feels hard, and do not exceed the recommended product thickness.
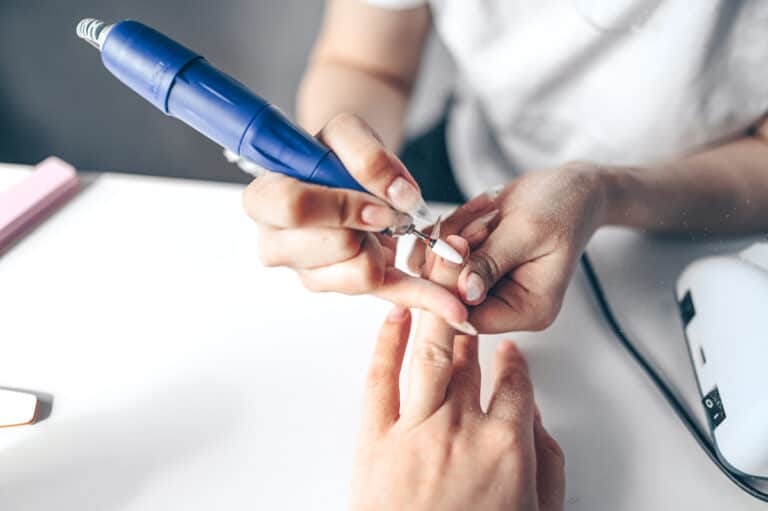
- After curing, file and refine the shape as needed without filing into the natural nail.
- Apply colour and a compatible top coat in the order required by your system, curing each gel layer as directed.
A well-applied PolyGel enhancement may be ready for maintenance after roughly 2-4 weeks, but lifting, cracks, length, and nail growth matter more than the calendar alone.
More thickness does not automatically mean more strength. Appropriate apex placement, intact sidewalls, balanced free-edge thickness, and full curing are more important. Excessively thick product can cure poorly if it exceeds the system’s intended application depth.
As the natural nail grows, a visible growth area will develop near the cuticle and the enhancement may need rebalancing.
A fill can be appropriate when the existing product is secure and the natural nail is healthy, but lifting, cracks, trapped moisture, discolouration, pain, or signs of infection should not simply be covered.
Builder Gel Application Process
If you’re using builder gel, the exact steps depend heavily on whether it is a soak-off builder, builder-in-a-bottle, or hard-gel system. Here are the basic tools commonly used:
- Clean, dry nails prepared according to the product system
- Builder gel
- Base coat if required by the builder gel. Use the gel base specified by the brand; a regular lacquer base coat is not automatically interchangeable.
- Gel brush, unless the builder comes in a bottle with its own brush
- UV light that is compatible with the product
- Top coat
- Nail file
Depending on the formula, builder gel can be used over the natural nail, with tips, or over forms. Some soak-off builders are intended mainly for overlays and short-to-medium extensions, while hard gels can support more sculpting and generally require file-off removal.
If you want colour over the builder, choose a compatible gel colour and apply it before the final top coat unless your brand instructs otherwise.
Here are the basic steps of the builder gel application:
- Start with clean, dry nails and complete the prep required by your builder-gel system. Apply tips or forms if the product is designed for them.
- Apply a base or bonding layer only if required, then cure it with the compatible lamp for the manufacturer’s specified time.
- Apply the builder gel using the technique recommended for its viscosity. For self-leveling gels, keep product away from the skin and watch the sidewalls and cuticle while it levels.
Work in controlled amounts rather than relying on a fixed number of coats, and remove any flooded gel before curing.
- Cure each application for the full specified time using the lamp recommended for the product. A firm surface does not confirm that deeper product is fully cured.
- Build the apex and free edge according to the length and shape you are creating. Some systems use a slip layer and one structured bead, while others use multiple coats.
Do not make the product excessively thick just to chase strength.
- After the builder is fully cured, file and refine the structure if the product and technique require filing.
- If using gel colour, apply and cure it now according to its instructions.
- Finish with the compatible top coat and cure it for the required time. After curing and finishing, apply cuticle oil to the surrounding skin if desired.
Builder gel is often maintained at roughly 2-4 weeks, but actual timing depends on nail growth, length, preparation, product compatibility, cracks, and whether any lifting develops.
The goal is not simply to apply “enough layers.” A durable builder-gel nail needs balanced architecture, appropriate thickness, and complete curing for the chosen length.
The application time varies. Self-leveling builder gel can be fast in experienced hands, while a runnier formula may require more control or flash-curing to prevent flooding.
There is no universal requirement for 3-4 builder-gel layers. Use the amount and application method specified by the manufacturer for your nail length and service.
PolyGel Vs Builder Gel: Which Should You Choose?
The better fit depends on how you like to work and what type of enhancement you want, rather than one product being universally better.
Both can create durable overlays and extensions when the product is suitable for the service, applied with balanced architecture, kept off the skin, and fully cured in the intended lamp.
Choose based on viscosity, extension length, soak-off versus file-off removal, lamp compatibility, and the complete system you are willing to follow.
If you prefer a product that stays where you place it while you sculpt, a PolyGel-style hybrid may feel easier to control.
If you like a self-leveling gel that can create a smooth overlay with less surface filing, builder gel may suit your technique better.
For natural-nail overlays and shorter extensions, many builder-in-a-bottle formulas are convenient. For more sculpted control, a dense hybrid gel can be useful.
Do not choose based on speed alone. Prep, structure, compatible curing, and skin-free application matter more than shaving a few minutes off the service.
The finished look can be very similar, so your decision should come down to the working texture and system requirements you prefer.
Neither material is automatically more flexible, stronger, or more break-resistant than acrylic in every formulation. Formula, nail length, architecture, curing, and daily use all affect durability.
Both can be used to add structure, thickness, and length, provided the specific product is intended for that service.
Whichever system you choose, use the matching lamp and cure schedule, keep uncured product off the skin, and follow the manufacturer’s removal instructions rather than peeling or prying the enhancement off.
Understanding those differences makes it much easier to choose between PolyGel and builder gel without relying on one-size-fits-all rules.
Related Articles
Can You Paint Over PolyGel Nails?
What Do You Need For PolyGel Nails?
Best PolyGel Nail Kits With Lamps