
How To Shorten Acrylic Nails At Home
Acrylic nails are a popular enhancement for adding length, structure, and shape, but a set that feels comfortable in the salon can quickly become awkward if it is longer than expected.
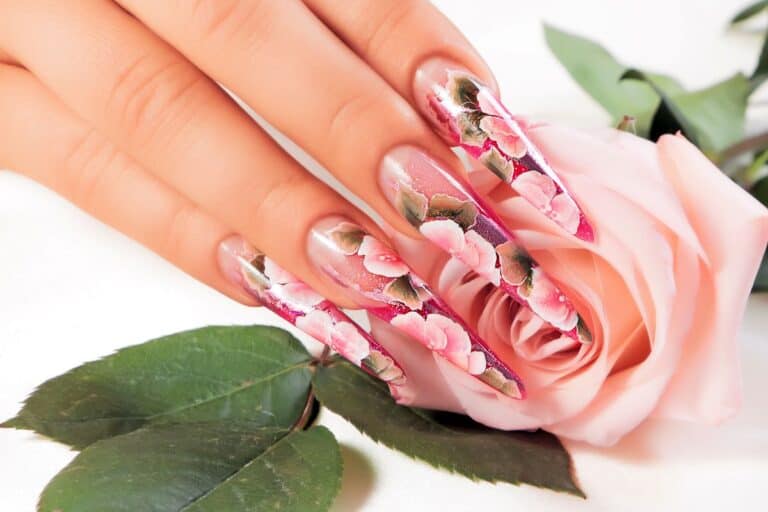
They can be built in many lengths and shapes, although longer sets place more leverage on the natural nail and require careful maintenance.
You can shorten a finished acrylic set, but doing it safely takes more than simply clipping the tips. The enhancement still needs enough structure and balanced shape after the length is removed.
For a small adjustment, a suitable hand file is usually all you need. Larger changes, thick enhancements, lifting, cracks, or heavily grown-out acrylic are better handled professionally.
If a salon is not practical and the set is still firmly attached, you can make a conservative at-home adjustment by filing gradually and checking the nail from several angles as you work.
Shortening a finished acrylic set at home carries some risk, especially if the enhancement is thick, lifted, cracked, or heavily grown out.
Improper cutting, filing, or drilling can crack the enhancement, create lifting, or thin and injure the natural nail plate.
If you only need a small reduction in length and the acrylic is firmly attached, careful hand-filing is generally the most controlled at-home option.
So, how can you shorten acrylic nails at home?
For minor shortening, use a coarse-to-medium nail file and remove length gradually from the artificial free edge. Check where your natural nail ends before you begin, reshape the sidewalls and tip as you shorten, and stop if the acrylic flexes, cracks, lifts, or becomes painful. Clippers, tip cutters, and e-files carry more risk on a finished set.
The safest approach is slow and conservative. It is much easier to remove another millimeter than to repair a cracked enhancement or an over-filed natural nail.
Work slowly, stop if the enhancement starts to flex or crack, and do not shorten a nail that is already lifted, painful, or damaged.
Shortening Acrylic Nails At A Glance
- Small length adjustment: use a hand file and remove a little at a time.
- Large length reduction: professional shortening is safer because the nail may also need structural rebalancing.
- Grown-out set: consider a fill or rebalance rather than only shortening the tip.
- Lifted, cracked, painful, or discolored nail: do not shorten it at home until the problem is assessed.
- Unsure where your natural nail ends: file conservatively rather than cutting.
The goal is not only to make the nail shorter. The finished enhancement should still have an even free edge, balanced sidewalls, and enough structure to resist everyday leverage.
Help, My Acrylic Nails Are Too Long!
Going into a salon and leaving disappointed because you didn’t get what you asked for is a tale as old as time.
It can be challenging to speak up at the moment, especially for something as temporary as nails.

However, acrylics can grow longer than expected if you originally got them done too long ago or let them grow out. Overly long acrylic nails can even disturb your everyday activities.
The Set Was Applied Too Long
Sometimes the finished set simply feels longer than you expected once you start typing, texting, wearing contacts, working, or doing other everyday tasks.
If the acrylic is otherwise well attached and the change is small, careful filing can usually make the length more practical without removing the entire set.
If you need a dramatic reduction or a completely different shape, a nail technician can rebalance the enhancement instead of simply taking length off the free edge.
The condition of the natural nail depends heavily on proper application, maintenance, removal, and avoiding excessive filing or leverage.
Grown-Out Acrylic
Acrylic nails can also feel overly long as the natural nail grows and the enhancement moves farther from the cuticle area.
Fill timing varies with growth rate, lifting, and the design. Many clients return every few weeks, but there is no universal 2-3 week rule for every set.
Grown-out acrylic can be more difficult to rebalance because the original apex and stress area have shifted forward as the natural nail grows.
As the apex shifts forward, leverage on the free edge increases, which can make a long grown-out set more vulnerable to cracks or breaks.
If the set is heavily grown out, a professional rebalance or fill is usually safer than simply trimming the tips shorter at home.
When Not To Shorten Acrylic Nails At Home
A quick filing adjustment is reasonable only when the enhancement is secure and the natural nail feels normal underneath it. Stop and get professional help when shortening could make an existing problem worse.
- Lifting: shortening can put more movement through an area that has already separated from the nail.
- Cracks through the enhancement: pressure from filing or cutting can extend the crack toward the natural nail.
- Pain, tenderness, or throbbing: do not treat this as a simple length problem.
- Green, yellow, brown, or unusual discoloration beneath the acrylic: avoid covering or aggressively filing the area until the cause is clear.
- Heavy grow-out: the apex may have shifted too far forward, so the set may need rebalancing rather than only shorter tips.
- Major shape change: turning very long stilettos or coffins into a short shape can require more structural refinement than an at-home trim.
Tools Needed To Shorten Acrylic Nails
Shortening acrylic nails at home is easiest when you use the fewest tools necessary and prioritize control over speed.
Taking extra time reduces the chance of accidentally cutting, cracking, or over-filing the natural nail beneath the enhancement.
For most minor adjustments, a hand file is the essential tool. Clippers, tip cutters, and electric files are optional and introduce more risk when used on a finished enhancement.
File
One accessible tool is a nail file (we like this glass one from Amazon), although a traditional abrasive file is often faster on hard acrylic than a fine glass file.
A 100/150 grit file is commonly used on acrylic product, but avoid dragging a coarse surface across exposed natural nail.
A medium or coarse abrasive file removes acrylic more efficiently than a very fine natural-nail file, but the coarser surface should stay on the enhancement rather than exposed natural nail.
Hand-filing takes longer than drilling or clipping, but that slower pace makes it easier to see exactly how much length and shape you are removing.
It’s better to take it slow to achieve your desired length and shape.
Electric File
A nail drill or electric file can remove acrylic quickly (check out our list of the best files for acrylic nails), but speed also increases the risk of over-filing, heat, or injury.
It is most appropriate for people who already know how to control bit choice, speed, pressure, and hand position.
Electronic files can speed up shaping, but they should never be treated as effortless or risk-free.
If you are inexperienced with an e-file, hand-filing is slower but gives you more feedback and control and avoids the risk of rapidly creating heat or thinning one area too much.
However, they can be significantly more expensive and less accessible than a standard file.
Nail Clippers
Nail clippers can remove length quickly, but cutting through a finished acrylic enhancement can create pressure cracks or lift the product from the natural nail.
If you need a large amount of length removed, a salon visit is safer, especially on thick, strongly curved, cracked, lifted, or heavily grown-out acrylics.
If you do use a clipper on an acrylic free edge, only cut product that clearly extends beyond the natural nail and stop if the acrylic flexes or cracks.
Do not try to force a thick acrylic nail through a clipper in one hard squeeze.
Large toenail clippers are not automatically safer for acrylic because the pressure can still split the enhancement.
Tip Cutter
A tip cutter is designed to trim artificial tips before or during enhancement construction, but that does not mean it is ideal for every finished acrylic set.
If you already understand how the tool behaves, a tip cutter may be useful on suitable artificial free edges.
A tip cutter is shaped to cut artificial nail tips, but finished acrylic can still crack or lift if the tool compresses the enhancement.
For occasional at-home shortening, a file is usually the more controlled investment. A tip cutter is unnecessary when you only need to remove a few millimeters.
How To Shorten Acrylic Nails
For a firmly attached set that only needs a modest adjustment, the safest method is to identify the natural nail, choose the final shape, shorten gradually, then refine the sidewalls and free edge.
If the nails are only slightly too long and are firmly attached, the following steps can help you make a conservative adjustment.
Do not rush to make both hands perfectly even in one pass. Shorten one nail conservatively, compare the others against it, and refine the set gradually.
If anything looks lifted, cracked, unusually thin, painful, or difficult to identify, stop and ask a nail technician to shorten or rebalance the set.
Taking each step slowly lowers the risk, but it cannot guarantee that a finished acrylic set will shorten cleanly without cracking or lifting.
Quick Step-By-Step Method
- Inspect every nail for lifting, cracks, pain, or discoloration before filing.
- Look underneath the free edge so you know where the natural nail ends.
- Choose your final shape and target length before removing much material.
- File the free edge gradually, alternating sides so one side does not become much shorter than the other.
- Refine the sidewalls and tip to restore the intended square, oval, almond, coffin, or other shape.
- Check the nail from the side. If shortening has made the structure look unbalanced or the apex is heavily grown out, stop and have the set rebalanced professionally.
- Smooth rough edges and check again for cracks or lifting before finishing.
Consider Your Natural Nails
First, look underneath your acrylic nails. Where do your natural nails stop?
This matters because you do not want to accidentally clip or aggressively file the natural nail hidden underneath the extension.

If you cannot clearly tell where the natural nail ends, shorten by filing rather than cutting.
Removing a little length at a time gives you much more control and makes it easier to avoid the natural nail hidden underneath.
Assess Your Length
Next, it’s time to assess your length. How long have your nails grown out?
How much length do you want to remove?
This tells you whether a simple filing adjustment is realistic or whether the amount of shortening is large enough to justify professional reshaping.
If you need to remove a significant amount of length, professional shortening is safer than forcing a thick enhancement through clippers.
If you only need a small amount of length removed, a file gives you more control and is generally the better at-home option.
Determine Your Shape
Next, it’s time to determine your desired nail shape.
Decide on the final shape before removing much length, because shortening changes the proportions of square, coffin, almond, stiletto, and oval nails differently.
For example, if you want them short and square, file the free edge straighter and refine the sidewalls gradually.
Likewise, for an almond shape, taper the sidewalls gradually and round the tip without filing deeply into the stress area.
Cut Nails To Remove Excess Length
If a large artificial free edge extends beyond the natural nail, cutting may seem faster, but filing is the safer default for most finished acrylic sets because it places less sudden pressure through the enhancement.
If a professional uses a cutter, removing bulk length first can speed up filing, but at home the pressure from cutting can crack the enhancement.
When in doubt, accept the slower filing process rather than trading speed for a higher risk of splitting the acrylic or stressing the natural nail.
If you only need to shape or slightly shorten the nails, skip cutting and file gradually.
For a small amount of shortening, filing gives you the best control over both length and shape.
Slowly Shape And File
Once the rough length is reduced, refine the free edge and sidewalls until the nail returns to the shape you want.
Check the nails from the top, side, and free edge as you work so you do not remove too much from one side or thin the enhancement unevenly.
If filing causes heat, pain, vibration discomfort, or pressure at the natural nail, stop and reassess rather than pushing through it.
Once the length and shape are even, smooth any rough free-edge areas and check that no cracks or lifting developed during the process.
Acrylic Nail Tips
The main risks are over-filing, pressure cracks, lifting, and accidentally shortening the natural nail underneath.
Most problems happen when too much length or thickness is removed too quickly, so keep checking the enhancement as you work.
Avoid over-filing, never force a cutting tool through thick acrylic, and stop if you see a crack spreading toward the natural nail.
Over-filing and improper cutting can damage the enhancement and remove layers of the natural nail plate.
Avoid Over-Filing
Over-filing can thin the acrylic excessively and, if you reach the natural nail, remove layers of the nail plate.
A thinned natural nail may feel tender, bend more easily, or split until the damaged portion grows out.
Over-filing does not stop nail growth at the matrix, but it can leave the existing nail plate too thin or sore for another enhancement until it recovers.
You can easily over-file the nails with a manual and electric file, so always proceed cautiously.
Cut With Care
If you use a cutting tool at all, only work on a clearly artificial free edge and use minimal pressure.
Both tip cutters and regular clippers can transmit pressure through a finished acrylic enhancement and may cause cracking or lifting.
If you are using a cutting tool on an artificial free edge, never force a single deep cut through a thick enhancement.
Cutting straight through the center can create stress lines or fractures in the acrylic, especially on curved or long nails.
If the natural nail extends beneath the area you are cutting, it can also be injured.
For a visual tutorial, take a look at this video from YoungNailsInc on YouTube.
Shortening Acrylic Nails FAQs
Can You Shorten Acrylic Nails After They Are Done?
Yes. A finished acrylic set can be shortened, especially when only a small amount of length needs to come off. Hand-filing is the most controlled at-home method because it removes material gradually.
Can You Cut Acrylic Nails With Nail Clippers?
You can sometimes cut a clearly artificial free edge, but clippers place sudden pressure through the enhancement and can cause cracking or lifting. Filing is the safer default for most finished acrylic sets.
Will Shortening Acrylic Nails Ruin The Shape?
It can change the proportions. Coffin, almond, stiletto, and other tapered shapes usually need their sidewalls and tip refined after length is removed. Do not shorten only the center of the free edge and expect the original shape to remain unchanged.
What Grit File Should You Use On Acrylic Nails?
A coarse-to-medium abrasive file such as 100/150 grit is commonly used on acrylic product. Keep coarse grit away from exposed natural nail and switch to a finer surface when you only need light refinement.
Should You Shorten Grown-Out Acrylic Nails Or Get A Fill?
If the set is noticeably grown out, a fill or rebalance is usually more useful than only shortening the tips. Growth moves the apex and stress area forward, so reducing the free edge does not automatically restore the original structure.
The Takeaway
Shortening acrylics at home is most manageable when the set is firmly attached, undamaged, and only needs a small reduction in length.
For minor shortening, a good hand file and patience are usually enough. Clippers are optional and carry more risk on finished acrylic.
Careful hand-filing lets you reduce length gradually while reshaping the free edge and checking that the acrylic remains balanced.
An e-file or tip cutter can work faster in trained hands, but neither tool automatically makes at-home shortening safer.
Stop and see a nail professional if you notice lifting, a crack running toward the natural nail, pain, discoloration beneath the enhancement, or uncertainty about where the natural nail ends.
Related Articles
Best Alternatives To Acrylic Nails
How To Take Off Acrylic Nails With Hot Water
Acrylic Nails Coming Off After 2 Days – What Happened?