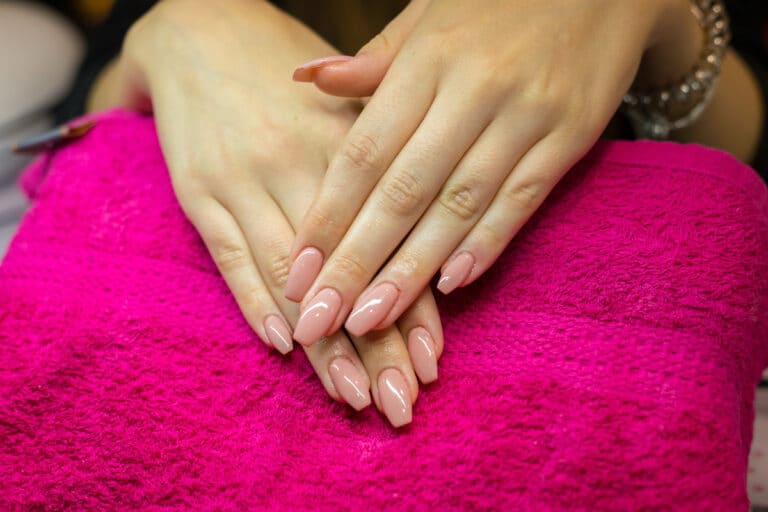

Can You Put PolyGel Over Acrylic?
PolyGel over acrylic may be an option for a professional fill or rebalance, provided the remaining acrylic is sound and the product system supports that use. It is not a way to fix lifting simply by covering it with another layer.
The decision depends on three things: the condition of the old acrylic, compatibility with the new product, and the structure of the finished nail. Adding thickness alone does not make a grown-out set more secure.
The terminology can be confusing at first, especially because people sometimes use words such as gel, builder gel, acrylic, and PolyGel as though they are interchangeable. They are not, and the differences affect prep, curing, maintenance, and removal.
If you already wear acrylic and want to try PolyGel, one of the most common questions is whether you can apply it directly over the acrylic you already have.
Can you put polygel over acrylic?
Sometimes, yes: a trained technician may retain firmly attached acrylic and rebalance with a compatible PolyGel system. Do not apply it over lifted, cracked, or discoloured product. If the manufacturer does not provide guidance for use over acrylic, confirm compatibility before proceeding rather than assuming the two systems will bond.
Below, we’ll break down when layering can make sense, when removal is safer, and how acrylic, gel, and PolyGel differ in everyday wear.
What is PolyGel?
Acrylic and gel are established nail systems, but “gel” can refer to more than gel polish. Builder gels and hard gels can also be used to create overlays and extensions.
PolyGel is a sculptable, light-cured nail enhancement with a thick paste-like texture. PolyGel is a Gelish brand name, although “polygel” is often used informally for similar hybrid or acrygel products. Their application and removal instructions are not necessarily interchangeable.
It is often described as combining some of the strength and sculpting ability of acrylic with the controlled application of a gel system, although performance varies by brand and application technique.
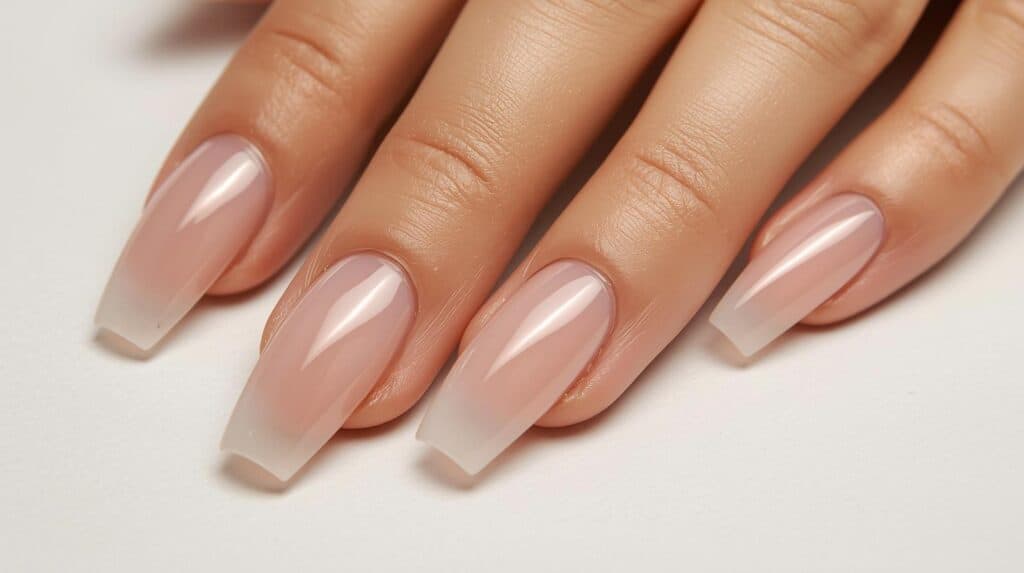
It can be used for overlays, added structure, repairs, or extensions, depending on the product system and the look you want.
Unlike traditional acrylic, PolyGel does not require you to mix liquid monomer and powder at a precise ratio. The product is dispensed ready to sculpt, usually with a brush and a compatible slip solution or shaping liquid.
Its extended working time can make shaping feel more forgiving, but prep, thickness, lamp compatibility, and full curing still matter. A surface that feels hard is not proof that the material underneath has cured adequately.
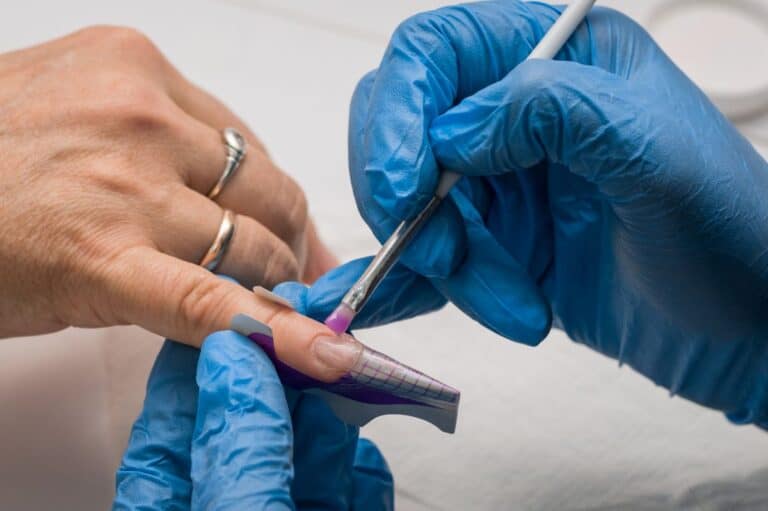
PolyGel has a dense, putty-like consistency. It can be sculpted over natural nails or used with tips, forms, or dual forms, depending on the system. Many kits include a dedicated spatula and brush rather than a standard acrylic brush.
Once shaped, it is cured under the lamp specified by the manufacturer. Cure time depends on the formula, lamp output, product thickness, and colour.
Because it does not begin hardening in the same way as air-curing acrylic, you generally have more time to refine the shape before curing.
That extra working time is one reason technicians may enjoy using it. PolyGel is also available in clear, nude, pink, white, and other shades that can be worn alone or finished with polish.
Can You Apply PolyGel Over Acrylic?
If the existing acrylic is secure and structurally sound, ask your technician whether their PolyGel system supports an infill over it. Knowing which products are already on the nails helps them plan preparation and later removal.
There is no single approach for every set. Some technicians will reduce the bulk of the acrylic, remove any lifted material, prep the remaining surface, and rebalance with PolyGel, while others prefer to remove the old enhancement and start with one system. The condition of the existing acrylic and the manufacturer’s compatibility guidance should drive the decision.
What matters most is that PolyGel is not used to hide lifting, trapped moisture, cracks, or a possible infection. Covering a problem area can make it harder to monitor and may increase the chance of further lifting.
An infill covers new growth near the cuticle; a rebalance also restores the shape and position of the apex, the thicker area that supports the nail. Retaining sound acrylic can avoid unnecessary removal, but the technician still needs to correct the whole structure.
For a completely new PolyGel set, starting on properly prepped natural nails or a compatible extension system gives the technician more control over adhesion, structure, and future maintenance.
How To Put PolyGel Over Acrylic
The following is a professional service overview, not a substitute for your system’s training. Before starting, confirm that the manufacturer supports application over acrylic and that you have its specified prep products and lamp.
- Inspect the acrylic first. Remove colour or top coat as appropriate so the underlying enhancement can be checked. Stop if there is pain, unusual discolouration, swelling, or separation of the natural nail from its bed.
- Remove compromised product. A trained technician should remove lifted or cracked material without prying it off or filing into the natural nail. If lifting is extensive or the remaining product is unstable, plan removal instead of an overlay.
- Rebalance the existing enhancement. Shorten if needed, reduce excess bulk, and reassess the apex and sidewalls. Avoid leaving a thick old apex under an equally thick new layer.
- Clean and prep the surface. Refine the retained acrylic as directed, remove dust, and prepare exposed new growth gently. Follow the system’s directions for where to apply dehydrator, primer, or base; do not assume each belongs over both acrylic and natural nail.
- Apply and sculpt the PolyGel. Use the specified shaping liquid sparingly, keep uncured product off the skin, and build a balanced structure within the manufacturer’s thickness guidance. Remove any skin contact before curing.
- Cure exactly as directed. Use the specified compatible lamp, hand position, and cure time before filing or finishing. A lamp’s wattage alone does not establish compatibility, and an extra-long cure is not a reliable fix for the wrong lamp or excessive thickness.
When Should You Remove The Acrylic First?
Starting fresh is usually the better choice if the acrylic has significant lifting, cracks, excessive bulk, multiple old layers, or an unknown product underneath. It can also make future maintenance simpler when you want to switch completely to PolyGel.
Do not cover green, dark, or otherwise unusual discolouration, pain, swelling, or nail separation. These signs cannot be diagnosed from colour alone. Seek assessment from a healthcare professional for suspected infection or injury, and arrange safe removal rather than prying the enhancement off yourself.
Acrylic Vs Gel Vs PolyGel – Pros and Cons
If you’re new to nail enhancements, the biggest differences are how each system cures, how it is sculpted, the amount of odour during application, and how it is maintained or removed.
Here is a practical comparison of acrylic, gel, and PolyGel so you can understand what each option is best suited for.
Acrylic Nails
Acrylic is a durable nail enhancement that can be used as an overlay on the natural nail or sculpted into an extension.
Application generally involves sanitising and preparing the natural nail, gently removing surface shine where required, and applying a mixture of acrylic liquid monomer and polymer powder. Aggressive filing of the natural nail is unnecessary and can thin the nail plate.
The liquid-and-powder mixture forms a bead that is sculpted into shape and hardens through a chemical reaction without a nail lamp. Once finished and filed smooth, it can be worn as-is or polished.
Acrylic suits technicians who are comfortable controlling the liquid-to-powder ratio and sculpting before the bead sets. That timed working process is one of its main practical differences from PolyGel.
The main advantages of acrylic are strength, sculpting versatility, and the ability to create significant length.
A properly maintained acrylic enhancement may remain on the nail for weeks, but most wearers need regular infills or rebalancing as the natural nail grows, often around every two to three weeks.
Removal can take time, especially when the product is thick. Acrylic should not be peeled or pried from the nail.
Removal commonly involves reducing the bulk with a file and soaking the remaining product with acetone, then gently removing softened material without scraping the natural nail.
Acetone can temporarily dehydrate the nail plate and surrounding skin. However, much of the lasting damage associated with enhancements comes from over-filing, forceful removal, or repeated trauma rather than acetone alone.
Careful prep and removal are therefore just as important as the enhancement product itself.
Pros:
- They can create a strong, durable enhancement.
- They deliver a smooth top for applying nail art.
- You can choose the length of your nails.
Cons:
- The application has a chemical odor.
- Over-filing, lifting, or improper removal can damage the natural nail.
- Thicker application can look less natural if the structure is not refined carefully.
Gel Nails
The term gel nails can mean different things. Gel polish is a thin colour coating, while builder gel and hard gel can add structure and may be used for overlays or extensions.
A typical gel-polish service uses a compatible base coat, colour coats, and top coat. Builder-gel services use a thicker structural gel and may require a different prep and application process.
Each gel layer is cured under a UV or LED lamp for the time specified by the product manufacturer. Using the correct lamp and cure time is important because under-cured gel can increase the risk of lifting and skin exposure to uncured acrylates.
Gel polish can provide a glossy, durable finish that often wears for around two weeks or more, although longevity varies with nail condition, prep, application, and lifestyle.
Gel is not automatically safer for the natural nail than acrylic. With either system, over-prep, picking, peeling, and aggressive removal are common causes of thinning and surface damage.
Gel becomes hard only after curing, which gives the technician control over working time. It also has some practical considerations.
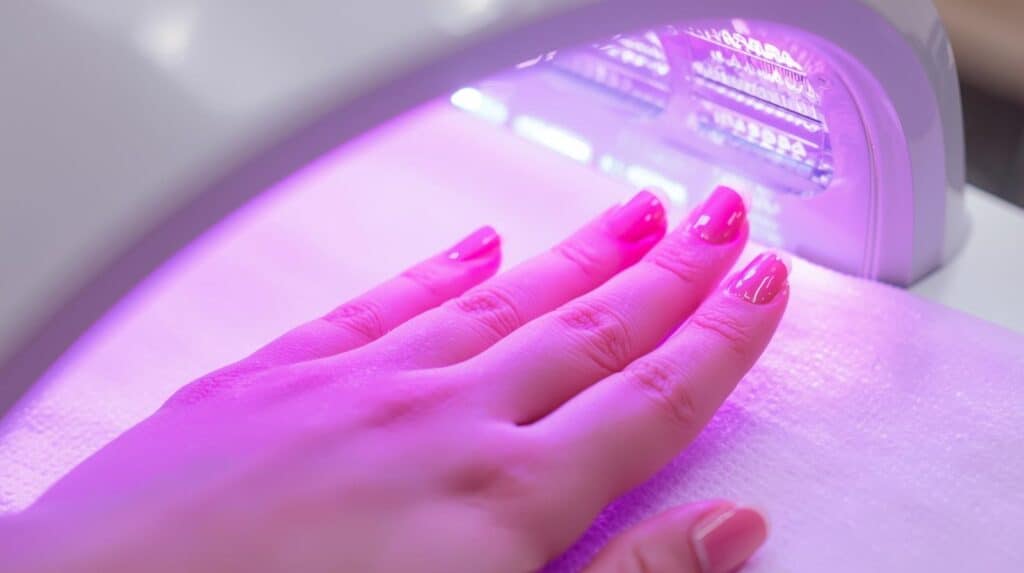
Compare like-for-like services: gel polish is a colour coating, while builder gel, acrylic, and PolyGel can provide structure. A maintained enhancement may stay in place across several appointments, but it still needs growth and lifting checked regularly.
Removal also depends on the formula. Soak-off gel can usually be filed lightly and softened with acetone, while hard gel generally needs to be filed down. The product should never be peeled from the nail.
Pros:
- Gels provide a fresh and shiny look.
- When correctly applied and removed, they can be worn without excessive natural-nail filing.
- The coating sets in a compatible lamp rather than waiting for ordinary polish to air-dry.
- Flexibility varies by formula; soft gel polish and rigid structural gels behave differently.
- Application is generally lower in odour than liquid-and-powder acrylic, though products are not necessarily fragrance-free.
Cons:
- Gel polish may need maintenance sooner than some structured enhancements.
- Nail lamps involve UV exposure. The American Academy of Dermatology recommends broad-spectrum, water-resistant SPF 30 or higher on hands, or dark, opaque gloves with the fingertips cut out.
- Some builder gels can create a temporary heat spike as the product polymerises, especially in thick layers.
- If wrongly applied, the gel can easily peel off.
- Peeling or aggressive filing during removal can damage the natural nail.
PolyGel Nails
PolyGel was developed as another option for structured nail enhancements. It is often described as a hybrid because it has a sculptable consistency and requires light curing rather than air curing.
It can be used by trained professionals and experienced home users, but safe results still depend on proper prep, avoiding skin contact, correct structure, and complete curing.
Similar-looking hybrid products can have different prep, lamp, and removal requirements. Use the instructions for the exact product you own rather than borrowing a cure time from another brand’s tutorial.
Application usually involves prepping the nail, applying any required dehydrator, primer, or base product, sculpting the PolyGel, curing it, then filing and finishing. The exact steps should follow the system you are using.
It can be worn as a natural-nail overlay or built into an extension. The apex and sidewalls still need enough structure to support the chosen length.
PolyGel is cured under a compatible UV or LED nail lamp. Many people find a well-shaped PolyGel set comfortable to wear, but weight and longevity depend more on product thickness, nail length, structure, and maintenance than on the category name alone.
One practical advantage is that it does not use the same liquid monomer as traditional acrylic, so application is typically much lower in odour. Removal can also feel more controlled when the product is filed down correctly.
Gelish’s PolyGel instructions describe file-down removal. Other hybrid products may have different directions. A technician may leave a thin, firmly attached layer to avoid over-filing, but should never retain lifted or suspect material simply to protect the nail.
PolyGel is available in a wide range of colours and finishes and can be shaped thinly for a natural appearance or built with more structure for longer extensions.
Pros:
- It can provide a strong, sculptable enhancement when correctly structured.
- It is generally lower in odour than traditional liquid-and-powder acrylic.
- It cures on demand under a compatible UV or LED nail lamp.
- Many formulas can be reduced and removed by careful filing.
- A well-balanced set can feel comfortable without unnecessary bulk.
Cons:
- Requires a compatible lamp, careful control of thickness, and skilled filing for many systems; service cost varies by salon.
Is PolyGel Better than Acrylic?
Acrylic and PolyGel cure differently: traditional acrylic hardens through a chemical reaction in the liquid-and-powder system, while PolyGel requires a compatible nail lamp.
Neither system is universally better. PolyGel offers long working time and lower odour, while acrylic is strong, widely available, and familiar to many technicians. The better choice depends on the desired length, structure, service time, maintenance plan, and technician skill.
PolyGel may appeal if you prefer less monomer odour and more shaping time. Lower odour does not mean allergy-free, however, and switching from acrylic to PolyGel is not a safe workaround for a suspected nail-product allergy.
Removal method should not be the only deciding factor. Acrylic is usually reduced and soaked, while many PolyGel systems are filed down. Either method can damage the natural nail if performed aggressively.
Price varies by salon, location, nail length, design, and technician. PolyGel can cost more than a basic gel-polish manicure because it is a structured enhancement service.
Wear time is individual rather than fixed. A well-applied PolyGel set can last for weeks with appropriate maintenance, but visible growth, lifting, and the need to rebalance the structure still determine when you should return for service.
Choosing a sheer pink or nude shade can make regrowth less visually obvious, but it does not eliminate the need for regular maintenance.
PolyGel is not inherently damage-free. Natural-nail damage is more closely linked to over-filing, improper prep, picking, lifting, and forceful removal than to whether the enhancement is acrylic or PolyGel.
If you develop itching, swelling, blistering, or persistent redness around the nails, stop using the products and seek medical advice. Do not test uncured nail products on your skin or apply another system to hide a reaction.
For a mixed set, tell the technician that PolyGel sits over acrylic. They may need to reduce the file-off upper layer before addressing the acrylic beneath it; soaking alone may not remove both layers.
Related Questions
Which lasts longer, acrylic or Gel?
Acrylic enhancements can remain durable for weeks, but they normally need fills or rebalancing as the natural nail grows. Wear time is not the same as the recommended interval between maintenance appointments.
Gel polish often wears for around two to three weeks, while builder or hard gel can be maintained as a structured enhancement for longer.
PolyGel can also wear for several weeks, with the timing of fills depending on nail growth, lifting, length, and overall structure.
Is it Better to Use Gel or Regular Polish on Acrylic Nails?
Both gel polish and regular nail polish can be worn over acrylic. Gel polish is useful when you want a glossy, cured finish with good chip resistance.
Regular polish can be convenient if you change colours often. Use a remover your technician recommends for the enhancement, since prolonged acetone exposure can soften acrylic. Avoid picking or peeling either coating.
Is Gel or Acrylic More Expensive?
Pricing varies considerably. A basic gel-polish manicure may cost less than a full acrylic set, while structured gel or detailed extensions can cost as much as or more than acrylic.
When comparing quotes, ask whether they include removal, infills, repairs, and gel colour. A low initial price may not reflect the cost of maintaining the set.
What Can I Use As a Slip Solution for PolyGel?
The safest choice is the slip solution recommended for your PolyGel system. Some formulas can be shaped with isopropyl alcohol, but the acceptable concentration and amount vary by brand, so check the manufacturer’s instructions before substituting it.
Do not use acetone as a makeshift slip solution. It can interfere with some enhancement products and is intended primarily as a remover or solvent. For a cured inhibition layer, use the cleanser recommended for that product.
Final Thoughts
Can you put PolyGel over acrylic? Yes, in some cases. The existing acrylic should be secure, clean, free of lifting, and properly prepped, and the PolyGel system should be compatible with the service you are performing.
If the acrylic is cracked, lifting, discoloured, or excessively bulky, remove the compromised product instead of sealing it underneath PolyGel. A full removal may also be preferable when you want to switch completely to one system.
If you only want a new colour, you may not need a PolyGel layer at all. Refinishing sound acrylic with suitable polish can change the look without adding another structural product.
That controlled working time can be an advantage over air-curing acrylic, but it does not make PolyGel universally superior. Acrylic and PolyGel each have situations where they work well.
Compared with a thin gel-polish manicure, PolyGel provides more structure and can support added length. Longevity still depends on prep, application, nail growth, lifestyle, and maintenance.
If lower odour, sculpting control, and a light-cured enhancement appeal to you, PolyGel is worth considering alongside acrylic and builder gel.
The key is to choose the system that fits your nails and service goals, follow the manufacturer’s instructions, and prioritise careful prep and removal over forcing one product to work in every situation.
Related Articles
Polygel Nails Keep Popping Off? – Here’s What To Do
13 Best Setting Powders For Dry Skin Of 2025
Eyeliner On Lower Lid Only (What To Do + What To Avoid)