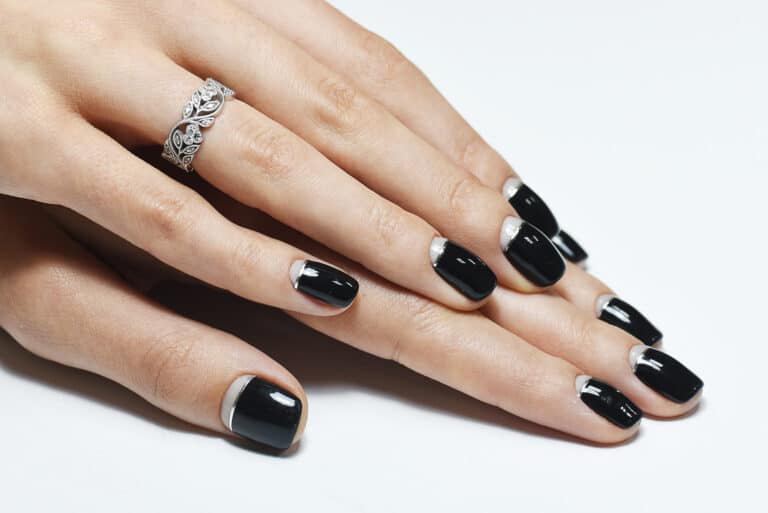

7 Best Polygel Nail Kits With Lamps
Polygel nail kits give at-home users a way to create structured gel nail extensions and overlays without learning the bead-and-brush technique used for traditional liquid-and-powder acrylic.
They can be used without a salon appointment, but durable results still depend on careful prep, controlled product thickness, clean application, and complete curing.
Polygel is often easier to control than runnier builder gels because it stays where you place it, but there is still a learning curve. When applied in the correct thickness and cured with a compatible lamp, it can create a firm, durable enhancement.
If you want to do your own polygel nails at home, you need a compatible gel system, curing lamp, prep tools, and removal method rather than simply the largest kit.
Choosing a compatible system is especially important because under-cured gel and repeated skin contact with uncured product can increase the risk of irritation or acrylate sensitization.
Below, we’ll break down what matters in a polygel kit and compare seven lamp-equipped options, with extra attention to compatibility, curing, removal, and beginner usability.
Buyer’s Guide – Polygel Nail Kits With Lamps
A polygel nail kit can contain everything from the gel and lamp to forms, slip solution, files, brushes, decorations, and prep products.
The large accessory counts can make kits look more complete than they really are, so focus first on the core products required for safe, predictable application.
Use the following criteria to compare kits before you buy:
Full Kit
Choose a polygel kit that contains the core products and tools needed for a complete application, or make sure any missing items are easy to purchase separately.
This typically includes the polygel itself, the base and top products specified by the system, a compatible UV-emitting nail lamp for curing the gel, forms or dual forms if you want extensions, and tools for shaping and removal.
Useful application tools include a dual-ended brush and spatula, the brand-recommended slip solution, and forms or dual forms if you are building length. Tweezers, decals, gems, and other nail-art extras are optional.
Other useful tools include nail files, buffers, lint-free wipes, and decoration supplies. Avoid aggressively cutting or scraping living cuticle tissue simply because a tool is included in the kit.
Before ordering, compare the listing with the manufacturer’s application steps so you know the bundle actually includes what that system requires.
Quality Products
For gel products, “quality” should mean more than attractive packaging or a long accessory list.
Price alone does not determine safety. More important factors are clear labeling, ingredient information, compatible curing instructions, and a reputable seller or manufacturer.
No enhancement can guarantee zero nail damage. Problems are more likely with over-filing, peeling or prying off product, under-curing, or repeated skin exposure to uncured gel.
Premature lifting or popping off can happen with any brand when prep, nail structure, lamp compatibility, cure time, or application thickness is wrong.
Full-Sized Kit
Product size matters if you plan to practice repeatedly or create several full sets.
Check the actual tube and bottle sizes rather than assuming that “full kit” means full-size gel, base, top coat, and slip solution.
If you are learning, a smaller kit can still make sense if the core products are compatible, clearly labeled, and easy to replace individually once you know you like the system.
UV Or LED Lamp
Polygel needs to be fully cured under a compatible lamp. If a kit includes a lamp, verify that the manufacturer specifies it for the included gel rather than assuming a higher wattage automatically means a better or faster cure.
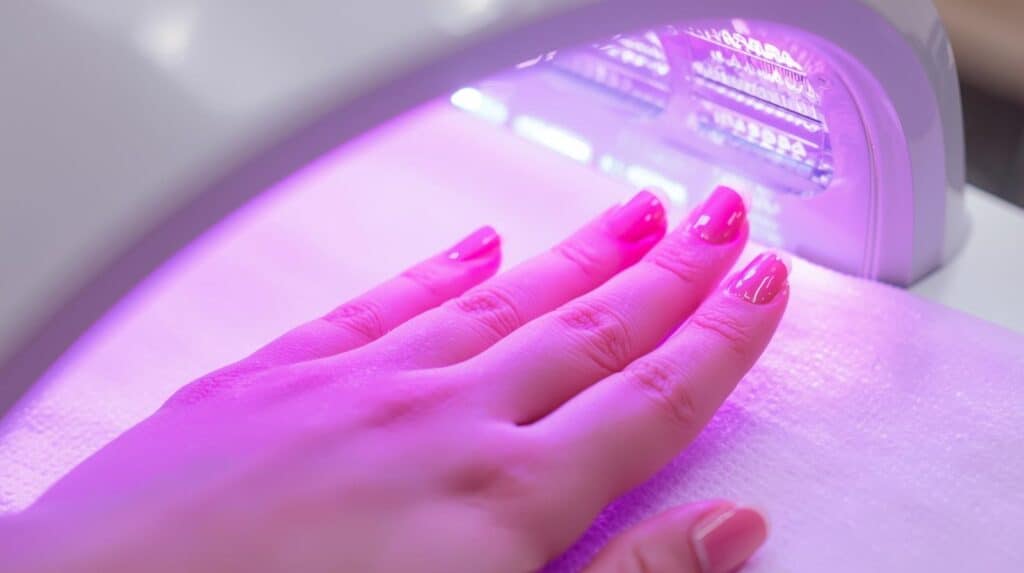
You will often see nail lamps marketed as LED, UV, or UV/LED. In practice, LED nail lamps used for gel curing still emit ultraviolet light; the important question is whether the lamp emits the wavelengths and exposure the gel system requires.
Some modern LED-based lamps cure compatible gels faster than older fluorescent-bulb lamps, but you should follow the gel manufacturer’s stated cure time rather than shortening it based on lamp wattage or appearance.
Lamp size, portability, timer settings, sensor design, and full-hand coverage can all affect convenience. For repeated gel manicures, broad-spectrum SPF 30+ on exposed hand skin or dark, opaque fingerless gloves are optional ways to reduce incidental UV exposure.
Variety Of Colours
A range of colors can make a starter kit more versatile, but shade count is less important than compatible core products, a suitable lamp, and clear curing instructions.
You might want a popping pink now, but decide on a more subdued peach for your next set.
The number of included shades varies widely by kit and can change as brands update bundles.
Check to see if you can purchase add-on packs of colours for the kit you have chosen.
Being able to buy compatible shades separately is useful because you can expand the color range later without switching to an unrelated gel system.
Polygel Removal
Removal should be part of the buying decision because you will eventually need to remove or rebalance the old polygel as the natural nail grows.
Removal is one of the easiest times to damage the natural nail, so avoid peeling, prying, or aggressively drilling through the product.
Check the manufacturer’s removal instructions before buying. Some polygel products are primarily filed off, while others are formulated to soften with acetone after the bulk has been reduced. The correct method depends on the specific product.
Easy To Use
For home use, clear instructions, a controllable formula, and a predictable curing system matter more than a huge accessory bundle.
A beginner kit should make the sequence of prep, application, curing, shaping, finishing, and removal easy to understand.
The tools should be practical, and the gel should be firm enough to shape without running into the sidewalls before curing.
If the instructions are vague about lamp compatibility or cure time, that is a bigger concern than missing decorative extras.
Ideally, your kit will include specific instructions for prep, layer thickness, lamp compatibility, curing time, and removal.
But just in case, here’s a great tutorial on how to do your own polygels at home from the Beauty Vault:
This tutorial is useful for visualizing the general shaping process, but always let the instructions for your own gel and lamp override a third-party timing or curing routine.
It also gives beginners a clearer idea of how much practice can go into product placement, dual-form application, and final shaping.
Use it as a technique reference rather than as proof that every polygel system should be applied or cured in exactly the same way.
The 7 Best Polygel Nail Kits With Lamps
Below are seven polygel kits with lamps to compare. Product bundles change frequently, so confirm the current contents, lamp, gel sizes, and removal instructions on the listing before purchasing:
| Rank | Product | Includes |
|---|---|---|
| 1. | Astound Beauty Polygel Nail Kit | UV lamp, glitter/glow-in-the-dark polygel, nail forms, dual forms, base & top coats, file, brush/spatula, slip solution |
| 2. | Beetles Poly Extension Gel Nail Kit | Lamp, matte/glossy top coat, base coat, file, slip solution, nail strengthener gel, rhinestones, gems, glitters, nail foil, flame decals and stripping tapes, nail forms, dual forms, tweezers, brush |
| 3. | Modelones Gel Nail Polish Kit | UV lamp, 7 gel polishes, glossy top coat, base coat, primer, tools |
| 4. | Vishine Polygel Nail Kit | UV lamp, 8 polygels, base & top coat, slip solution, dual forms, brush-spatula, file, buffer, nail cutter, tweezer, cuticle fork, cuticle oil, stripping tapes, gems |
| 5. | Morovan Poly Nail Gel Polish Set | UV lamp, UV light beads, 6 polygel polishes, flash powder, top & base coats, dual-ended brush, nail models, sequins, slip solution |
| 6. | Joytii Gel Nail Polish Kit | UV lamp, 8 gel polishes, glossy & matte top coats, base coat, 9 manicure tools |
| 7. | Gershion Poly Nail Gel Kit | UV lamp, 6 color polygel, slip solution, top coat, base gel, file, tweezers, brush-spatula, rhinestones, stickers, nail foil, glitters, stripping tape |
The linked listings were sold as starter kits with lamps and accessories, but current contents can vary. Here is what each option is designed to offer:
1. Astound Beauty Polygel Nail Kit
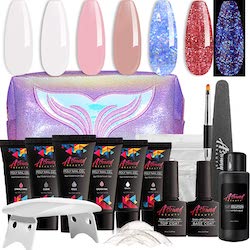
This Astound Beauty set is positioned as an all-in-one polygel starter kit with several color gels, application tools, forms, and a curing lamp.
Polygel does not simply air-dry quickly; it needs the curing process specified for the included gel. Beginners should expect some practice when learning product amount, dual-form placement, and shaping.
Wear time varies with nail prep, length, lifestyle, structure, and product compatibility. Treat month-long wear as a possibility for some users rather than a guarantee.
The kit has been sold with both paper nail forms and dual forms, which gives you two different extension-building methods to practice.
The listed bundle includes six colors, including glitter options and a glow-in-the-dark shade, although current color assortments should be confirmed before ordering.
The included shades give you several looks to experiment with before buying extra colors.
The listing has also included a storage bag, base and top coat, dual forms, a dual-ended brush, nail file, slip solution, and an LED-style curing lamp.
Check the current listing to confirm that the lamp and every accessory mentioned are still included in the bundle.
2. Beetles Poly Extension Gel Nail Kit
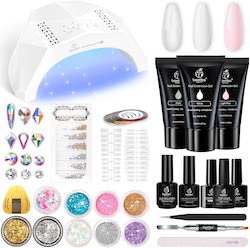
This Beetles kit is one of the more nail-art-focused options, combining the basic poly-extension-gel setup with a large assortment of decorative extras.
This all-in-one kit contains three different colour gels: pink, white, and clear.
It also includes a large selection of decorative items, which may appeal to users who want to experiment with nail art.
The listed bundle includes a 48W lamp, matte and glossy top coats, a base, file, slip solution, nail-strengthening gel, rhinestones, gems, six glitter colors, foil, decals, striping tape, nail forms, dual forms, a brush, and tweezers. Confirm the current bundle because accessory assortments can change.
A “non-toxic” label should not be treated as a guarantee that gel cannot irritate or trigger allergy. Keep uncured product off the skin, cure with the recommended lamp, and stop using it if you develop persistent redness, itching, swelling, or blistering.
If the current kit instructions specify 60-90 seconds, use that timing with the included compatible lamp. Do not shorten cure time simply because the surface feels hard.
The main appeal is the large decoration selection plus both dual-form and nail-form application options.
This is one of the more decoration-focused options in the list, assuming the current bundle still contains the accessories shown.
3. Modelones Gel Nail Polish Kit
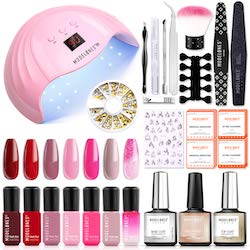
This Modelones kit is designed as an at-home polygel starter set with multiple colors, forms, tools, and a lamp.
The listed bundle includes seven gel colors, a base coat, top coat, 120 dual forms in 12 sizes, 36 straight dual forms, slip solution, a file, dual-ended brush, spatula, and a 48W nail lamp.
It has also been sold with rhinestones and decals for extra nail-art options.
Beginners may still need several attempts to get comfortable with product amount, apex placement, and dual-form pressure.
Use the current kit instructions as the primary guide for curing and application because formulas and lamps can change between versions.
Polygel’s thicker texture can be easier to control than runny gel, but excess product can still squeeze onto the skin around dual forms, so clean it away before curing.
With suitable prep and structure, polygel may wear for several weeks before maintenance, but lifting or breakage can happen earlier depending on the user and application.
Some polygel systems can be filled as the natural nail grows, but only refill product that is still securely attached. Remove lifted material rather than trapping moisture or debris underneath it.
The seven included colors give beginners enough variety to practice different looks before deciding whether they want to buy additional shades.
4. Vishine Polygel Nail Kit
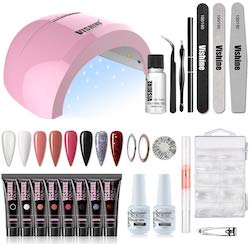
The Vishine Polygel Nail Kit is another at-home bundle that combines color gels, forms, tools, and a lamp.
The listing has included eight shades that cover neutral, French-manicure, brighter, and glitter-style looks.
The listing has included a 48W UV/LED-style nail lamp, base and top products, slip solution, dual forms, shaping tools, and decorations. Verify the current bundle contents before ordering because accessories can change.
The kit is designed to cover the main steps for building extensions at home, but application speed and wear time still depend heavily on practice, prep, structure, and curing.
Do not assume a gel is risk-free because it is marketed as gentle or free from certain ingredients. Correct curing, limited skin contact, and careful removal matter more for reducing avoidable problems.
Once you are comfortable with the basic extension technique, you can focus more on finishing and nail art.
The included rhinestones, glitter, gems, mirror powder, and colors give you several ways to customize the finished set.
5. Morovan Poly Nail Gel Polish Set
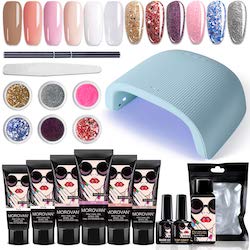
This Morovan kit has been sold with a 48W nail lamp, although wattage alone does not tell you whether a lamp will fully cure every gel formula.
The lamp includes an auto-sensing function, which is convenient during application. Cure speed should still follow the gel instructions.
The sensor turns the lamp on when a hand is inserted and off when it is removed, which can make curing easier when the other hand is occupied.
That can reduce the need to reach for buttons with a freshly applied, uncured set.
The kit has been sold with six gel colors, including white, clear, and pink, plus six mini glitter powders for nail-art variation.
The kit is intended to cover the basic at-home process, but confirm that the current version still includes every core product you need.
This can be a practical starter option if the current instructions clearly explain prep, product thickness, curing, and removal with the included tools.
The appeal here is the combination of color options, nail art extras, and a full-size-style curing lamp rather than “fast drying,” because the gel must be properly cured.
6. Joytii Gel Nail Polish Kit
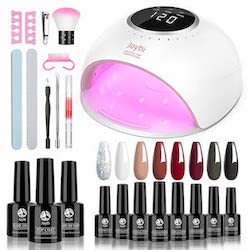
The Joytii gel nail kit has been sold with several deeper shades along with white and glitter options.
Its appeal is the combination of color variety, application tools, and a sensor-equipped curing lamp in one bundle.
The Joytii bundle has been sold with a smart-sensor UV/LED-style nail lamp. The automatic sensor is convenient, but there is no reason to assume it cures faster than most lamps without comparing compatible gel systems and manufacturer cure times.
There are three different timer settings on the lamp, so you can adjust it to suit exactly what you need.
Marketing terms such as “safe” or “harsh-chemical-free” do not remove the need to prevent uncured gel from touching skin and to cure every layer completely.
The kit combines the core application tools, decorative options, and a lamp with multiple timer settings.
This type of bundle can be convenient for at-home practice, but clean shaping and consistent curing usually improve with experience.
7. Gershion Poly Nail Gel Kit
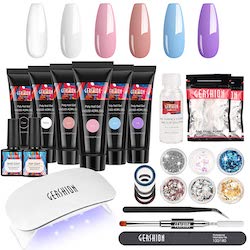
The Gershion Poly Nail Gel Kit has been sold with a portable mini lamp and a selection of application tools and colors.
You can choose from several gel colors in the listed kit, including clear, white, pink, burnt coral, cerulean, amethyst, and orchid.
These can be worn alone or used as base colors for the included glitter and rhinestone decorations.
The included shaping and decorating supplies make this a more complete starter bundle for someone who wants both extension-building tools and nail-art extras.
Wear time depends on preparation, nail structure, length, lifestyle, and curing. A mini lamp can be convenient for portability, but full curing should take exactly as long as the compatible product instructions require.
A home kit can save salon trips once you are comfortable with the technique, but rushing application or curing is not worth the tradeoff.
The listing has included the main tools and accessories for home application, but a mini lamp is worth checking carefully for full-hand coverage and compatibility with the included gel.
Do not rely on blanket “non-toxic” or “damage-free” claims. Artificial nail products can cause irritation or allergy in susceptible users, and over-filing or rough removal can thin the natural nail.
Related Questions
Is Polygel Easy to Use?
Polygel is usually thicker and less self-leveling than many builder gels, which gives you more time to position and shape it before curing.
Many kits include a slip solution to keep the brush from sticking while you shape the product. Use only what the manufacturer recommends, because flooding the bead with unrelated liquids can affect application.
Do Polygel Nails Break Easily?
Polygel can wear for several weeks when it is correctly structured, fully cured, and securely adhered, but there is no universal wear-time guarantee.
If polygel is applied too thickly, the bigger concern is that light may not adequately cure the deepest product, depending on the formula, color, lamp, and application thickness.
Under-cured gel may feel firm on the surface while still containing more unreacted material underneath, which can contribute to lifting, weakness, and unnecessary acrylate exposure.
Follow the manufacturer’s maximum thickness and cure instructions. Do not invent extra layering or cure schedules unless the product directions support them.
Can You Soak Off Polygel Nails?
Removal depends on the formula. Some polygels are primarily file-off products, while some newer systems are sold as soak-off or removable with acetone after filing down the bulk. Follow the exact instructions for your product and never peel the enhancement away from the natural nail.
You can also fill new growth with compatible polygel when the existing enhancement remains securely attached. Any lifted material should be removed before a refill rather than sealed underneath fresh product.
Related Articles
Can You Put PolyGel Over Acrylic?
13 Best Setting Powders For Dry Skin Of 2025
Eyeliner On Lower Lid Only (What To Do + What To Avoid)