
Best Masculine Makeup Tips – Including Contouring
Makeup is a tool, not a gender rule. You can use it to cover a blemish, reduce shine, add structure, emphasize traditionally masculine features, or create a much more expressive look.
That flexibility has made makeup more approachable for men, nonbinary people, and anyone who prefers a masculine or androgynous finish.
Makeup is no longer treated as something that belongs to only one demographic.
People of all genders, cultures, backgrounds, and styles can enjoy makeup, including men and nonbinary people.
You might want a nearly invisible routine that simply makes the skin look more even, or you may want contour, liner, and colour to change the overall impression of your features.
Neither approach is more correct. The useful question is simply what you want the makeup to do.
If there’s one useful rule in the makeup world, it’s that you can adapt products and techniques to the look you actually want.
You can keep things subtle, emphasize traditionally masculine features, cover a few concerns, or use makeup more creatively.
So, what are the best masculine makeup tips?
For a subtle masculine makeup look, focus on targeted concealer, controlled shine, groomed brows, and light contour rather than covering the whole face. For more definition, emphasize the jaw, cheekbones, brows, and lash line. If you want something expressive, eyeliner and eyeshadow give you plenty of room to experiment.
If your only goal is covering a blemish or reducing shine, you do not need a full makeup routine at all.
Whatever your goal, start with a few products and build the routine around what feels useful to you.
If you are new to makeup, keep the first routine small enough that you can see what each product actually changes.
Makeup can feel overwhelming at first because there are so many products, finishes, and techniques to choose from.
Below, we’ll break down simple complexion fixes first, then move into masculine contouring and more creative eye makeup.
Masculine Makeup Quick Start
If you want a low-key masculine makeup routine, you can keep it to four or five steps:
- Conceal only where needed: cover individual blemishes or under-eye darkness instead of automatically applying foundation everywhere.
- Control shine selectively: powder or blot the forehead, nose, and chin while leaving the rest of the skin looking natural.
- Groom the brows: clear or lightly tinted brow gel can add structure without making the brows look heavily filled in.
- Add subtle structure: a small amount of contour around the cheekbones, jaw, or temples can create a more angular effect.
- Optional eye definition: smudge a little brown, grey, or black pencil close to the lashes if you want the eyes to look stronger without a precise liner shape.
You do not need every step. For an everyday look, choose the two or three changes that make the biggest difference to you and leave the rest of the face alone.
Makeup For Men: A Simple Starting Routine

1. Got Zits?
If you want makeup to look subtle, spot concealing is one of the easiest places to start. You can cover a blemish without applying foundation across the entire face.
The key is matching the concealer closely to your skin and keeping the product concentrated only where you need it.
After washing your face and hands, apply a small amount of concealer to the blemish and blend only the edges into the surrounding skin.
For a natural result, use the least amount that gives you enough coverage. Thick layers can make texture more noticeable even when the colour is hidden.
If you have dry skin, find a hydrating concealer (we love this one from Neutrogena).
If you want more coverage, look for a concealer with a fuller-coverage or faster-setting formula (like this one from Maybelline), regardless of skin type.
A faster-setting formula may stay in place more easily, although wear time still depends on skin type, preparation, and how much product you apply.
For spot concealing, choose a shade that closely matches the surrounding skin so the covered area blends in rather than standing out.
There are literally hundreds of concealers on the market, so don’t be afraid to ask for help when it comes to finding a good shade and formula.
One affordable option to compare is E.l.f.
It’s affordable, and their Camo Concealer line would be a great place to start.
To apply, place a little concealer on the back of a clean hand and use a fingertip, small brush, or sponge to press it onto the blemish. Build gradually rather than trying to make the spot disappear with one thick layer.
If you are covering an active blemish, avoid repeatedly touching the applicator directly to broken or irritated skin. You can place a little product on a clean hand or palette first if hygiene is a concern.
Do not rub the product into the skin like lotion, or you won’t cover anything.
Take a look at this useful tutorial below from Brute Choi on YouTube.
2. Redness
Blushing can look great, but persistent facial redness can be something you prefer to tone down with makeup.
If your goal is to look as natural as possible, sheer coverage is usually easier to blend than a full-coverage base.
A colour-correcting BB or CC cream can be a practical option (such as this anti-redness BB cream from L’Oréal Paris).
You can also skip a dedicated complexion product and use a tinted sunscreen if it gives you enough evening-out for the look you want.
Tinted sunscreens are another useful option because they can even the look of the complexion while providing sun protection (like this hydrating one from CeraVe).
When it comes to choosing a face shade, it differs from choosing a concealer shade.
Match your product to the area where your face and neck meet so the base blends naturally with the rest of your skin.
What’s great about these light base products is that they’re buildable and easy to use.
Apply a small amount with clean fingers, a sponge, or a brush and blend it outward in thin layers. If the product contains SPF, remember that using only a tiny cosmetic amount may not provide the full labeled sun protection.
Blend the edges carefully so there is no obvious line between the product and bare skin.
You don’t need to apply it to your whole face if you don’t want to, either.
You can concentrate coverage on the reddest areas, then soften the edges into bare skin so the correction does not look like a visible patch.
Here’s a useful tutorial on how to hide redness with tinted products from Carl Cunard on YouTube.
3. Oil
If you’re concerned about shine or excess oil, a few simple products can help tone it down without making the skin look heavy.
A translucent powder is an easy option for reducing shine without adding much visible colour, although a well-matched tinted powder can work too.
If you’re interested, we have a whole article about the Best Face Powders for Men for you to check out.
One with colour can provide coverage as well, if you’re looking to cover blemishes, but use it sparingly if you go for this option because it can make your face look flat, cakey, or dry.
A lot of powders these days come with a powder puff for application, but if yours doesn’t, you’ll need to pick up a good powder brush to apply it with.
It’s easy to find a powder brush online, like this one, and many drugstores carry several affordable options.
Pick up some product with your brush and gently press it into the greasy areas of your face.
This is typically the chin and the “T-Zone” (a horizontal line on the forehead and down the nose).
Applying powder to those areas can reduce visible shine, although oil may still come through later in the day.
If you’re worried about the potential mess a powder can make, you could also try oil blotting sheets like these on Amazon.
These aren’t necessarily a makeup product as much as a cosmetic tool.
They’re basically little sheets of paper that soak up excess oil on the surface of your skin.
They do not usually leave behind a tint or powdery finish, and you can use them as needed when shine appears.
Blotting sheets are especially useful when you want to remove surface oil without adding another layer of powder.
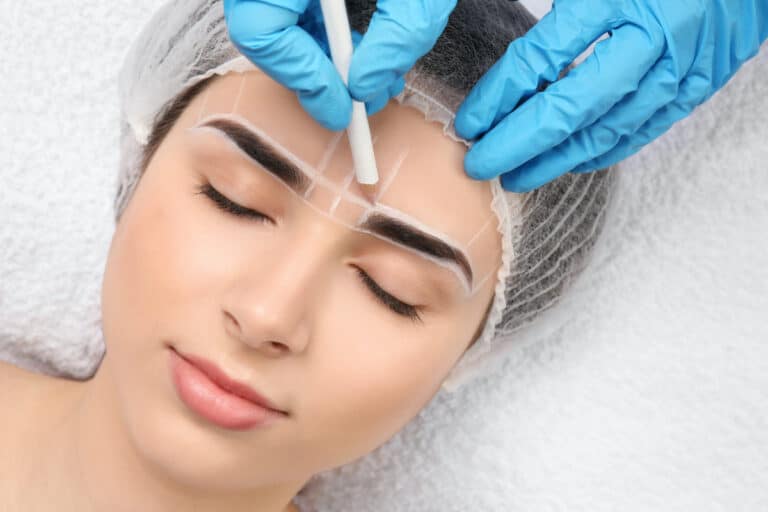
4. Groomed, Fuller-Looking Brows
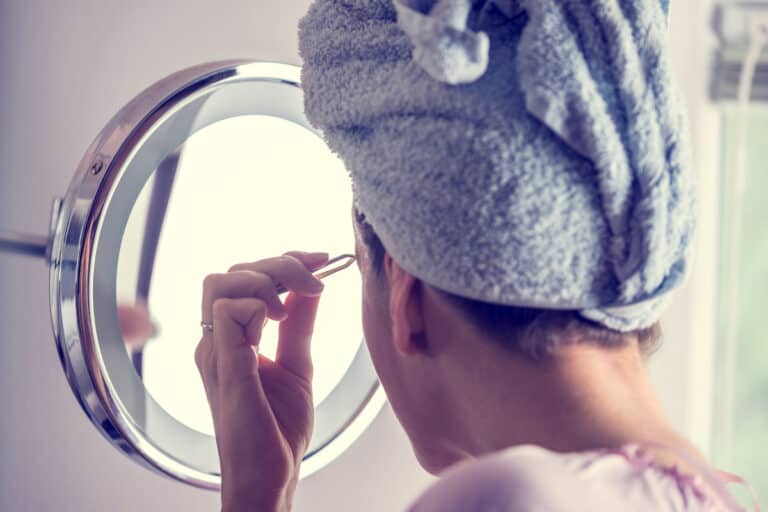
Tweezing can be uncomfortable, especially when you are shaping several hairs at once.
Brow hair thickness varies from person to person, so how uncomfortable tweezing feels depends more on your individual brows and technique than gender.
If you want your brows to look more controlled without making them look heavily drawn on, a brow gel can be enough (try this one from NYX).
Brow gels are there to lock your hair into place.
And you have the option of buying one with a tint (if you want fuller-looking brows) or buying one that’s clear simply to keep your hair under control.
Brow gel is useful if you want the hairs to look more even, lifted, or intentionally groomed without changing the natural brow shape very much.
Simply unscrew your brow gel to find a spoolie (like the kind you see on mascara), and brush the gel onto your brows using upwards motions.
If some brow hairs are very long, you can carefully trim only the tips that extend well beyond the shape after brushing them upward. Trim conservatively to avoid creating gaps.
You can also simply trim and tweeze your eyebrows, but sometimes that’s better said than done, and you really don’t want to end up over-plucking.
Here’s a great tutorial from JairWoo on YouTube for trimming your brows to perfection.
5. Dark Spots or Under Eyes
If under-eye darkness makes you look more tired than you feel, a small amount of concealer can brighten the area without changing the rest of your face.
Lack of sleep can make dark circles and puffiness look more noticeable for some people, but under-eye darkness can also be influenced by genetics, pigmentation, allergies, facial anatomy, and skin thickness.
While you work out a better sleeping schedule, consider picking up a brightening concealer (this one from Neutrogena includes antioxidants) for your skin!
Brightening or colour-correcting concealers are designed to neutralize or reflect light around grey, blue, purple, or brown tones under the eyes and around areas of discoloration.
If your under-eyes look puffy, a brief cool compress can temporarily make the area feel less swollen before you apply concealer.
You can use an eye cream like this one from CeraVe or a clean cool compress. Avoid placing frozen metal directly on the delicate eye area.
Cooling may temporarily reduce puffiness, while the concealer itself does most of the work when it comes to disguising darkness.
And if you’re covering dark spots, you’ll need to do some prep as well!
Make sure you wash your face before applying any product.
This is a trick you should do whenever you apply makeup.
Starting with clean skin helps makeup apply more evenly and reduces the amount of oil and debris sitting under the product.
Afterwards, use a clean finger to gently apply the brightening concealer onto the areas you want to correct.
If it’s your under-eyes, use light tapping or short blending motions so you do not move the product too far away from the area you want to cover.
Always buff it in using light dabbing motions.
Start with a small amount to begin, and you can build up coverage as you see fit.
If it’s dark spots you’re covering, press a small amount of concealer onto the spot and blend only the edges so you keep as much coverage as possible.
Because these are brightening concealers we’re using, we want to use them sparingly.
Some brightening concealers use light-reflective pigments, so a light hand can help keep the finish natural.
Here’s a great tutorial from the Terribly Handsome channel on YouTube.
6. Pale Lips
Some people lack natural pigmentation in their lips, or the pigmentation tends to fade out on the outer edges of their mouth, leaving you with a less defined lip line.
If you want slightly more definition without an obvious lipstick look, a tinted balm or sheer lip stain can add colour while still showing the natural lip texture.
This doesn’t need to be expensive; it could be as simple as choosing a tinted chapstick next time you’re at the grocery store.
But, if you’re looking for something you can put on and not have to worry about reapplying or the colour smudging throughout the day, investing in a lip stain is a great choice.
Lip stains will truly stain your lips.
Lip stains generally wear longer than creamy lip products, but food, drinks, lip balm, and friction can still fade them unevenly.
There are a multitude of different formulas out there, so do your research to find your best fit.
The most common form comes in a tube, the product inside being very thin and watery.
To use, simply dot some product onto your mouth and quickly rub it in with a clean finger.
Work fast, as this product dries down quickly-this will ensure you don’t leave the fine lines of your mouth too deeply saturated with colour.
Some lip stains can feel drying, so you can apply a light layer of lip balm before or after the stain depending on how the formula wears.
Or you can apply Chapstick afterwards.
Masculine Contouring – For All Genders
If you want to create more angular or traditionally masculine-looking definition, contouring can visually emphasize the jaw, cheekbones, temples, or nose. The goal is not to follow one universal “male” face map, but to place shadow where it supports the structure you want to emphasize.
Contouring creates the illusion of shadow. When it is well blended and close to the natural depth of your skin, it can make features appear more defined without looking like an obvious stripe of makeup.
Popular places to add shadow include below the cheekbones, around the jawline, at the temples, and along the sides of the nose depending on the effect you want.
Of course, there are a ton of options to choose from when it comes to contouring.
Powder Contour
You can use a powder contour, which likely comes in a compact.
For this, you’re going to need a contour brush (which is different from the powder brush we talked about earlier).
A contour brush has angular bristles, so it’s built for making sharper lines.
Powder contour can work especially well on oilier skin or over a set base because it is easy to build gradually and can wear well for several hours.
Depending on the formula and how much you apply, powder can look more matte or visibly made-up than a sheer cream contour.
Cream Contour
If you want a subtle, skin-like finish, a cream contour can be easier to melt into a light base or bare skin.
Cream contours can come in palettes, tubes, or even bullets like lipsticks.
These formulas melt into the skin, giving a very skin-like finish.
However, it’s easy to go overboard with these, and any mistakes are a bit harder to correct, so only choose this option if you can promise yourself to use a light hand!
How To Do It
Before applying contour, look at your face in even lighting and decide which features you actually want to emphasize.
You’re first going to want to map out the places you want to contour on your skin.
It’s better to go in with a game plan so that you don’t overdo it with product!
There is no single correct contour map because cheekbone height, jaw shape, forehead width, and nose shape vary from person to person.
For cheekbones, feel where the cheekbone sits and place contour slightly underneath it rather than following the deepest hollow automatically.
You don’t want to go in as deep as the hollows, but rather from your ear to just underneath your cheekbone.
Keep the placement consistent with the shape you want to create, then blend the edges so the contour reads as shadow rather than a stripe.
For the jawline, you’ll want to feel your skin to find the bone underneath your jaw.
This is where you’ll be putting contour.
It may seem strange at first, but the shadow gives such a crisp definition.
You can also add a little contour near the angle of the jaw if you want that area to look more defined.
Contour creates the illusion of shadow, which can make an area look more recessed, narrower, or more defined depending on placement.
If you want the nose to appear narrower, for example, you can place a small amount of contour along the sides of the bridge and blend carefully.
Contour near the temples or hairline can also create the illusion of slightly more structure around the forehead.
Using Powdered Contour
If you’ve chosen a powder form, use a light hand with your angle brush to pick up some product.
You don’t need to dig into the pan to get a ton of product-even just lightly dabbing the brush onto the pan can be enough.
We suggest starting with the lightest amount of powder possible, especially for beginners.
From here, brush the powder into your cheekbone using an upward motion.
Blending slightly upward can keep cheek contour from visually dragging the feature downward.
Using Cream Contour
If you’ve opted for a cream formula, we think the best way to apply this is by using a beauty sponge.
You can get the disposable white triangles, which are inexpensive and come in large packs for regular use.
But, if you’ll be doing this regularly, we think that investing in a good quality beauty sponge is a great choice too.
Plus, it blends much more easily.
Go ahead and dampen your sponge a bit.
We don’t want it wet, so make sure you squeeze any excess water out.
After that, go ahead and dot along the contour points on your cheekbone with your product.
Use a light hand. As we mentioned earlier, it’s easy to go overboard with this, and it’s easier to add more product than it is to take product away.
Once you’re all dotted up, bounce your sponge onto the contour dots until they blend into your skin.
Don’t use swiping motions as they could leave you streaky; simply work on the dots with your sponge until they melt into the natural line of your bone structure.
This method needs a little more patience, so only do it if you have time to be extra careful!
Another tip? Don’t dot out your entire face if it’s your first time.
Once you have more practice and can get through the process faster, then you can map out your face, but we don’t want to risk the product drying down too much before you get to it.
This will make it harder to blend and work with, leaving you looking blotchy, which is definitely not natural.
If you’re more of a visual learner, here’s a great tutorial from Carl Cunard on YouTube for accentuating already masculine features using contour.
If your starting features are softer or more rounded and you want a more angular masculine effect, contour placement can create that impression without requiring heavy coverage across the whole face.
Here’s another great tutorial from Marthe Woertman on YouTube.
For The Artsy
Maybe you’re looking to express your own personal style when it comes to your makeup, and if that’s the case, we think that starting with eye makeup is a fantastic choice.
The eyes are typically the focal point of most artsy makeup looks, as people use their lid space like an artist’s palette for their work.
With practice, you could do extremely intricate designs, but if you’re just starting, then we’ll teach you the basics!
Eyeliner
A pencil eyeliner is one of the easier eye products to experiment with because it can create anything from barely-there lash definition to a deliberately smoky look.
Compared with liquid liner, pencil is usually easier to soften, smudge, and correct while you are learning.
This works well if you want smoky, dark-looking eyes with a soft rock-inspired finish.
To do this, find a long-wearing pencil eyeliner.
A long-wear pencil can reduce unwanted smudging, although no eyeliner is completely transfer-proof on every eye shape or skin type.
After you’ve found your pick, make sure it’s a fine point so you have more control over where you’re placing the product.
Then, with a gentle hand, draw a line closest to your natural lash line. For a smoky look, line both your lower and upper lashes.
This is different from lining your waterline, which is closer to the inside of your eye-we’re only placing product on your skin.
Use a light and gentle hand, and don’t be afraid of messing up.
The great thing about this smoky look is that it’s forgiving!
When you’re all lined up, you can blend and smudge the liner out to give a less defined appearance to your liner.
You can do this with a clean fingertip or a cotton swab. Keep the pressure gentle, and try brown, grey, navy, burgundy, or other shades if you want something softer than black.
Liquid and Gel Liner
If you’re feeling up to it, liquid and gel liner is a great way to make clean, defined lines on your lids.
There are tons of different formulas and brush types for these liners.
Some come in a pen form, which many beginners find easier to control.
But there are also ones with brushes you have to dip into the product itself (this is a great option if you have steady hands, or are already familiar with using paintbrushes).
Instead of just lining your lash line, you can use liquid liners to draw designs on your face!
Liquid and gel liners can create sharper, more saturated lines than many pencils, although they usually take a little more practice.
Stars and teardrops are popular in the editorial sense, but you can do some personal research to find what fits best for you!
This is also a great option if you want to test out what some potential face tattoos would look like, since you have more control over your design!
Eyeshadow
If you want colour or extra eye definition without drawing a precise line, eyeshadow is another beginner-friendly option.
Eyeshadow can be as simple or as detailed as you want it to be.
There are no rules stating you have to use more than one shadow at a time, either.
So, you can sweep a single colour over your entire lid and call it a day, or you could play with shadows and highlight to make more complex eye looks.
Brushing a neutral brown shade over your lid is a great way to give it more definition if you’re looking for a natural finish.
But if you’re in the mood for something more fun, you could even sweep richer colours like reds and blues to really give your look some life.
Don’t feel limited to your lids either!
You could even pop the colour onto the inner corners of your eyes or underneath your lower lash line, depending on what look you’re going for.
This can look very editorial and high fashion.
Colourful eye makeup can work with masculine, feminine, and androgynous looks alike, and music and fashion have a long history of men wearing visible eye makeup.
How To Keep Masculine Makeup Looking Natural
If you want makeup to be difficult to detect, the biggest difference usually comes from using less product and blending the edges carefully, not from buying a special category of men’s makeup.
- Match concealer closely to the skin when spot concealing.
- Keep base products thin around facial hair so pigment does not collect visibly in stubble.
- Powder only where shine bothers you rather than flattening the whole complexion.
- Choose contour that looks like a believable shadow on your skin rather than an obviously warm bronzer stripe.
- Check the finished makeup in daylight as well as indoor lighting.
Most importantly, masculine makeup does not have to mean invisible makeup. A natural complexion, graphic liner, colourful shadow, or a completely bare lip can all fit the same overall style if that is the look you want.
Related Articles
How To Darken Eyelashes Without Mascara
Why Do My Eyelashes Go Down When I Apply Mascara?