
Do Hand Tied Extensions Cause Damage?
Hair extensions can add length, fullness, and styling flexibility, but every extension method also places some extra weight or tension on the natural hair.
They can make short or fine hair look fuller quickly, which is why it can be easy to forget how much additional hair is actually attached to your own strands.
There are several extension methods, and the best choice depends on your hair density, texture, scalp health, styling habits, and how much maintenance you are willing to do.
Common options include clip-ins, tape-ins, sew-ins, and hand-tied weft extensions.
Hand-tied extensions can create a natural-looking result, but they are not automatically the safest or least damaging option for every person.
Different extension methods create different patterns of tension, weight, friction, and maintenance, and any of them can contribute to breakage or traction if they are installed or cared for poorly.
So while extensions can look beautiful, it is worth understanding the risks before committing to a long-term installation.
Which begs the question, do hand-tied extensions cause damage?
Hand-tied extensions can cause damage if they are too heavy, too tight, poorly installed, left in too long, or attached to hair that is too fragile. A skilled installation with appropriate weight distribution and timely maintenance can reduce risk, but no extension method is completely damage-free.
Below, we explain what hand-tied extensions are, who may be a good candidate, how they are installed, and what helps reduce unnecessary tension and breakage.
What Are Hand-Tied Extensions?
Hand-tied extensions are wefts of hair that are sewn onto a beaded foundation created in the natural hair.
They share some similarities with sew-in extensions, but the support row is made with beads rather than a braided cornrow.
The stylist creates a row of small beads near the scalp, then stitches one or more wefts onto that foundation.
One advantage of many hand-tied methods is that they do not require adhesive or fusion heat directly on the natural hair.
The process is still detailed and can take several hours depending on the number of rows, amount of hair, and blending required.
Avoiding glue and fusion heat removes two potential sources of damage, but the method can still cause problems if the beads or wefts create too much tension.
Can You Do These Extensions At Home?
Unlike clip-in extensions, hand-tied wefts are difficult to install evenly on yourself because bead placement, tension, and weight distribution are hard to assess from your own head.
Professional installation is usually the safer choice, especially for the first set or if your natural hair is fine, fragile, or previously damaged.
When installed correctly, hand-tied extensions can be comfortable and relatively low-profile, but they should not be described as universally the gentlest extension method.
Because they do not rely on bonded glue or fusion heat, they avoid those specific risks, but the beads and sewn wefts still place mechanical stress on the natural hair.
There is also no single hair type that is automatically ideal for this method.
A stylist should assess hair density, strand strength, scalp condition, length, texture, and existing breakage before deciding whether hand-tied extensions are appropriate.
Which Hair Types Are Best For Hand-Tied Extensions?
For the safety of your hair and scalp, the installation should use sections large enough to support the weight without pulling.
Very dense hair is not automatically unsuitable for hand-tied extensions, but it may require more thoughtful placement, blending, and row design.
Beads should lie comfortably and discreetly without creating bumps, pressure points, or excessive tension.
Very curly or coily hair can also wear weft extensions, but the best method depends on the curl pattern, density, styling habits, and how well the extension texture matches the natural hair.
Beads are not guaranteed to slip simply because hair is curly. Installation technique, bead size, sectioning, and product buildup all matter.
For some clients, a braided sew-in may be a better match; for others, a beaded weft may work well. The safest choice should be individualized rather than based on texture alone.
Blunt haircuts can be harder to blend with long extensions because the natural perimeter may create a visible line.
Strategic layering or blending can soften that transition, but the final shape depends on the haircut and extension length.
This applies to most extension methods: the closer the extension texture, density, and cut are to the natural hair, the easier the blend usually looks.
Hand-tied extensions can work on straight, wavy, curly, and some coily textures when the stylist selects an appropriate installation and matching weft texture.
Fine hair may conceal a thin weft well, but it also has less individual strand strength, so the stylist must avoid attaching too much weight to small sections.
The goal is for the beads and wefts to lie flat while the natural hair can support the weight without soreness, pulling, or visible stress.
There is no universal rule that only thin-to-average density hair can achieve a seamless result.
Very dense hair may simply require different placement, more rows, or additional blending.
Length matters mainly for blending. Very short hair can make any extension method more difficult to conceal.
Collarbone length is not a strict minimum, but the shorter the natural hair is, the more skilled cutting and blending are usually required.
A proper consultation is the best way to determine whether your hair can support hand-tied extensions safely and whether the final result will blend well.
How Are The Extensions Applied?
During installation, you may see tools such as a loop tool, beads, thread, curved needle, pliers, sectioning clips, and the hair wefts.
The thread and curved needle are used to stitch the wefts securely onto the beaded row.
Pliers are used to close and later reopen the beads. Clips help section the hair cleanly during installation.
Some stylists customize or layer wefts before sewing, but traditional hand-tied installations do not require hair glue to attach the wefts to your natural hair.
If any adhesive is used as part of a customized method, it should stay on the extension material and away from the scalp unless the manufacturer specifically designed the system otherwise.
The stylist begins by creating a clean section where the row will sit, usually positioned so the natural hair can conceal the weft.
They then choose the bead size, spacing, and section size based on your density and the amount of weight the row will carry.
Small sections of natural hair are threaded through beads and secured with pliers to create the foundation.
The process should not cause sharp pain, burning, or a persistent headache. Mild awareness of the new weight is possible, but significant discomfort means the tension should be adjusted.
No extension method is completely damage-free, so pain should never be dismissed simply because the installation is supposed to be “gentle.”
Beads should sit close enough to the scalp to support the weft but not so tightly that they pull when you move, sleep, or style your hair.
The exact distance from the scalp varies with the method and stylist. Even spacing and comfortable tension matter more than one fixed measurement.
Once the beaded foundation is complete, the stylist positions the weft or wefts over the row based on the desired density.
The weft is secured over the bead row so the attachment points are hidden by the natural hair.
The stylist then uses thread to stitch the weft onto the row.
Using one continuous, secure thread path helps keep the row neat and stable.
Stitches are placed through the weft and around the beaded foundation according to the stylist's method.
At the end of the row, the thread is secured so the weft stays in place without unnecessary bulk.
The number of wefts used on each row depends on the amount of natural hair supporting them and the desired result.
The stylist continues sectioning, creating the beaded foundation, and sewing the wefts into place while checking comfort and balance.
Professional installation is especially valuable because the stylist must distribute the extension weight appropriately rather than overloading small sections.
Good weight distribution affects comfort, longevity, and the risk of breakage or traction.
The process can be lengthy, especially when several rows and detailed blending are required.
Installation time varies widely, so do not treat five hours as a universal expectation. The final blend also depends on cutting, color matching, density, and styling.
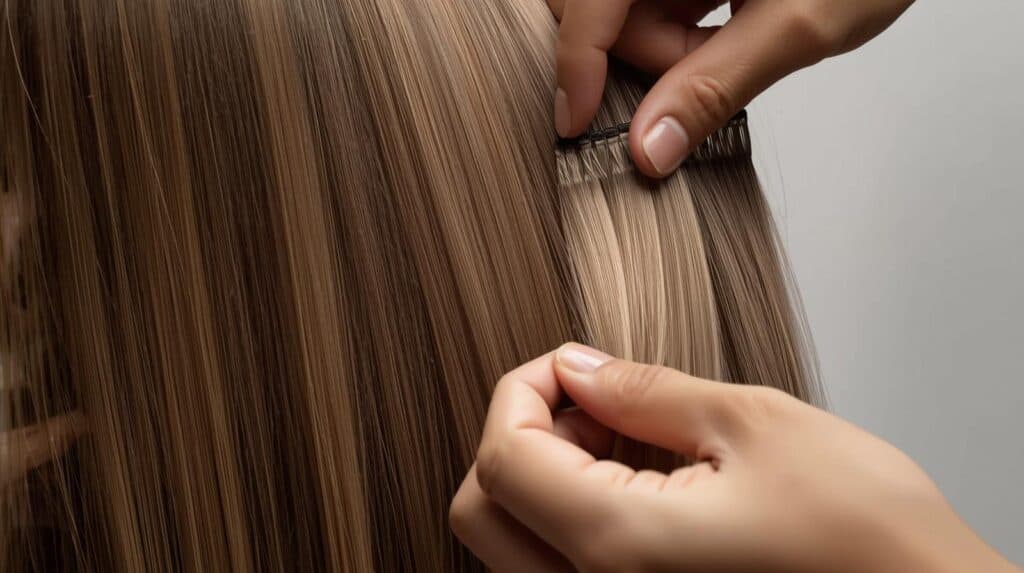
Hand-tied wefts can feel relatively flat against the head when installed well, but the overall weight depends on how much hair is added.
How To Care For Your Extensions
Hand-tied extensions still require regular maintenance, even if the day-to-day routine becomes easy once you are used to them.
Because the attachments grow away from the scalp with your natural hair, scheduled move-up appointments are important.
Your routine may need a few adjustments to reduce tangling, slipping, buildup, and excess tension around the rows.
Choose a shampoo that cleans the scalp effectively without leaving it irritated. Sulfates and parabens are not automatically harmful, so there is no need to avoid them categorically unless your stylist or your scalp responds poorly to a specific formula.
The goal is a clean, comfortable scalp and hair that is not overloaded with residue around the beads.
You do not need to avoid every product containing silicones. The more important issue is preventing heavy buildup or very slippery products from coating the attachment area.
Oils and serums can also contribute to slipping if they are applied directly to the bead row, so focus them on the mid-lengths and ends unless your stylist advises otherwise.
If you use oils, apply a small amount away from the attachment points.
Keep the scalp clean, but avoid repeatedly tugging or picking at the rows.
Touching your scalp does not make it produce more oil, but frequent manipulation can loosen beads or increase tangling around the attachments.
If you often run your fingers through your hair, be mindful around the rows so you do not catch or pull them.
Be especially gentle when washing, detangling, or brushing around the attachment points.
The beads should be secure, but forceful scratching, snagging, or brushing directly through the row can still disturb the installation.
Clean the scalp carefully around and between the rows rather than scrubbing aggressively over the beads.
Let shampoo cleanse the scalp and rinse thoroughly. Conditioner and heavy masks are usually better kept away from the attachment points unless your stylist says otherwise.
There is no universal rule to wash only 2-3 times a week. Wash often enough to keep your scalp clean and comfortable without creating unnecessary tangling.
Delaying washes does not “train” the scalp to produce less oil. Sebum production is influenced mainly by biology and hormones.
Clean hair can help reduce buildup around the beads, but over-washing and under-washing can both create problems depending on your scalp and routine.
Going to sleep with wet or very damp hair can increase tangling around extension rows.
It is usually better to dry the roots and attachment areas before bed, then secure the lengths loosely to reduce friction.
Wet hair can stretch and tangle more easily, especially if it is already chemically processed, but the hair follicles themselves are not “extremely delicate” simply because the strands are wet.
Use heat thoughtfully on both your natural hair and the extension hair.
Minimize repeated high heat, use the lowest effective temperature, and apply a heat protectant when appropriate.
Beyond those adjustments, most people can continue many of their normal styling habits while wearing extensions.
You can style and swim with hand-tied extensions, but chlorine, salt water, tangling, and wet attachment points still require extra care.
The best routine is the one that keeps the scalp comfortable, the rows secure, and the natural hair free from unnecessary tension.
Related Questions
How long do hand-tied extensions last?
The same hand-tied wefts may be reusable for several months if the hair quality remains good, but lifespan varies by brand, processing, home care, heat use, and how often they are moved up.
You will need to have the rows moved up professionally as the natural hair grows out.
Maintenance timing is commonly around 6-10 weeks, but your stylist may recommend earlier appointments if the row grows out quickly, slips, tangles, or creates excess tension.
Good home care can extend the usable life of the wefts, but the attachment itself still needs regular maintenance.
There is no universal eight-month expiration date. Replace the wefts when the hair becomes too worn, thin, tangled, or damaged to reuse safely.
You also do not need to reinstall a new set immediately if your scalp or natural hair shows thinning, soreness, breakage, or traction. In that case, take a break and have the hair assessed before adding more weight.
How much do hand-tied extensions cost?
This is a time-intensive service that uses professional labor and extension hair, so prices can vary widely.
Costs often run into the hundreds or even thousands of dollars, depending on location, stylist experience, amount and quality of hair, color work, and number of rows.
Remember to budget for move-up appointments and replacement hair as well as the initial installation.
Rather than judging value by a monthly cost calculation, consider the total maintenance commitment, how your natural hair responds, and whether the stylist prioritizes scalp and hair health.
Related Articles
How Long Do Eyeshadow Palettes Last?
Best Grayscale Eyeshadow Palettes